Showing posts with label Blender 3D. Show all posts

09 January 2013

Christopher Plush - Car Modeling & Texturing Video Training Review

Now that it's the start of a new year, it's time for another review of Blender training products.

This time it is another CGMasters training video set created by Christopher Plush covering the topics of Car Modeling And Texturing.

Those that have seen my other reviews know about CGMasters and how they put out very high quality training materials.  So when they contacted me asking if I would mind reviewing their latest creation, I was only too happy to, here's what I found.

Product Specifications:
  • Name : Car Modeling And Texturing
  • Author : Christopher Plush
  • Price : $60 (on 9th Jan 2013)
  • Runtime: 10 Hours (roughly)
  • Format  Downloadable Video

When you purchase this product you have 2 different options for how you will receive it.  You can either get it in DVD form or you can download it.  I am reviewing the downloadable version, but there is no difference in content between the DVD version and the download version.

The download version was quick to download with my internet connection, so if you have a stable connection you should be okay downloading it.  The download is large though, so be prepared.

Having downloaded all the files and extracted them from their archive, you are left with all the resources you need to get the most out of this training material.  Included in the download are:
  • Video files in mp4 format
  • All the finished renders
  • Textures and Resource and Blueprints
  • The Blend files
  • Copies Blender 2.64a
So all the things you will need to get started instantly with your learning and car modeling tasks are included and easily accessible.

You can access most of the files and resources directly from inside you web browser.  If you do not want to watch the training materials in your browser you can access the videos directly in your media player of choice.

The web interface is clean and easy to navigate and should make accessing the resources very simple.

While reviewing the videos, they were very clear and very well encoded.  All the videos and other resources were very well organised and easy to find when I needed them.

The video files are split up into many sections ranging from a couple of minutes to 35 minutes in length.  Each video tries to cover a different aspect of the creation of the final car model (Camaro ZL1).

The start of the training video covers the basics of setting up Blender's user interface for the most efficient workflow when modeling the car.  Christopher goes over some of the most important preference settings that he uses to make his job easier when carrying out the tasks required when modeling.  He also goes over some basic performance suggestions which help to keep Blender working as smoothly as possible.

With the basics of Blender's interface and preference settings covered he moves on to a short explanation of some of Blender's new features and how you can most effectively use them.  Specifically covered are Blender's BMesh NGON features, the Knife Tool use and Blender Bridging tool.  Also covered was an effective way to make and fill faces.  I found the explanation of Blender's Knife tool very interesting because I learned it could be used to Join edge together which I didn't know previously, I only knew about the J key.  So in my case these basics really helped me.

Having covered some prelimanaries of using Blender the training videos move on to the tasks required to start modeling of the car.

The first stage is setting up the Blueprint reference images which will be used throughout to accurately model the Camaro.

Christopher uses image planes for the display reference images for the front, side, top and back of the car.  This method is very effective and allows him to display background references images at an angle, which he would not have been able to do if he had used Blender's default background 3D Viewport image display method.

Having setup the Blueprint reference images Christopher explains the different types of projection snapping and shrinkwrapping tools Blender has and how to use them in useful ways when constructing car body surfaces.

I especially enjoy watching him demonstrate how to cut holes in curved surfaces, a task which is often difficult to get right.  He also demonstrates are very simple but effective way of modeling a car tire tread.  Which is later used again to make a fully modeled tire tread.  All of this done with very basic modifiers (curve, array and simple deform).

The remaining videos cover modeling the different parts of the car,  All the visible parts that make up the car are modeled, even less visible things like mufflers and break dics of the car are modeled to a very high standard, while keeping the amount of vertice, edges and faces to the minimum needed to get the job done.

Each different section of the car has its own separate video. Allowing you to focus on a speific part of the car modeling if you want to.

In the process of modeling the car a lot of Blender's different features and tools are covered.  So if you didn't know how to use them before starting watching, you will by the end of watching the videos.

Once the modeling of the car is almost finished Christopher goes over the car one more time fixing any mistakes and explaining why he is doing so.  This helps to show how you can fix issues you may encounter when modeling and some of the solutions.

After the actual modeling of all the car parts is completed, the tutorials move on to texturing the finished car model.  Giving it an effective looking car paint shaded look using Blender Internal's Materials and Material Nodes system.  Blender Cycles is not used to do the texturing and shading of the car, but the end result does not suffer from this.

The next topic covered is Studio setup, for lighting and background image setup, and getting Blender to create clay renders of the final car model.

After the various studio setup tasks such as lighting, background, render settings, and world settings are covered, final post processing effects are covered.

This involved the compositor.  The video tutorials for this part of Blender were short but effective and helped to give the final renders of the car more visual appeal.

Overall an excellent Car modelng, shading and texturing tutorial, very easy to follow and well produced.

I couldn't see any real problems or missing topics.  Some may argue it would have been better to use Cycles to do the shading and texturing but I think in this case Blender Internal was all that is needed, as the end result would not have looked any better in Cycles.

Go buy it!

Review Score 95%

08 November 2012

Victor Kuller Bacone - Blender Game Engine - Ebook review

Books covering Blender's Game Engine are sadly not published as frequently as they should be.  So whenever a book on Blender Game Engine gets put out I am instantly interested.

For those that don't know Blender's Game Engine is Blender's system for making games using all of Blender's available tools.  It's very simple to use yet allows you to make very intricate games, using combinations of node systems and Python scripting (Python Scripting is not covered in this book).

Personally I think Blender's Game Engine is somewhat under appreciated in terms of it's power and ease of use.  People tend to look at Unity 3D gaming system and go for that, even though it's not open source and is functionality limited if you don't buy the non-free version, which is overpriced.  On top of that Unity 3D is much harder to get started with as it doesn't have the super easy node system of the Blender Game Engine.

So when Packt released a new Blender Game Engine book for the beginner, off I went to download it.  At the time I downloaded it Packt was having a get one of their books free event, which must have been very popular as their site was almost unusable for several days.  I eventually managed to access the site and get the Blender Game Engine book for free.  That event has now ended though so this book is no longer free.

Product Specifications:
  • Name : Blender Game Engine
  • Author : Victor Kuller Bacone
  • Price : £12.74 (on 8th Nov 2012)
  • Pages : 206
  • Format : EBook
Blender Game Engine Cover

Given that this is one of Packt's Beginner's Guide series of books, it probably won't come as a surprise to learn that this book is aimed at the Blender Game Engine user beginner.  If you have never used the game engine before this book is specifically aimed at you.  Bear in mind though that this book is not for the complete Blender beginner.  You will be expected to know your way around Blender's interface and know already how to interact with the basics of Blender.  If you are expecting to be taught things like modeling and texturing this is not the book for you.

On starting to read this book the first thing I noticed was that the grammar was atrocious.  Whoever proof read/edited this book should be ashamed.  I am assuming that Victor Kuller Bacone is not a native English speaker, which is fine, I can't speak any other language apart English myself, so I am impressed by people who take the effort to learn a second language.  However the book editors/reviewers should have notice the bad grammar and fixed it for Victor.  Now normally some bad grammar will look unprofessional but doesn't really effect the content of the book.  In this case however it's so bad that it actually makes understanding what tasks and steps need to be done very difficult at times.  Thankfully there are many pictures in the EBook version of this book which made following the instructions in the EBook much easier.  Without the clear pictures I would have given up on the book completely.

The approach the book takes to teaching the use of Blender Game Engine is to construct a single simple level of a game using some of the tools that Blender Game Engine has to offer.

The book starts by giving a basic overview of the features and tools available in the Blender Game Engine.  Specifically the basic ways that the Logic Editor Nodes work and how to interact with them through drag and drop methods.

After the basics of the Blender Game Engine interface are described the book moves on to describing how to plan and develop a very simple game.

It does this by explaining how to aquire and prepare resources (models and textures) for this simple game.  Another annoyance pops up at this point because the book makes you install Sketch Up to export models from it rather than using properly exported models in a more useful open format such as Open Collada.  And since I reviewed this book on a Linux machine installing Sketch Up was not an option.  If you are on Linux you will have to find your own models.  This is not a major issue as it not hard to substitute your own models, but for a beginner who is already having to deal with all the new things in BGE, it's something you really should not have to deal with.  There also does not appear to be any provided blend files provided on the Packt website though this could change.

Once all the resources for your game are acquired the book describes how to append and prepare these resources for use in Blender's Game Engine.  These resources are used throughout the rest of the book to demonstrate the various features of the game engine.

The various major Logic Editor Node types are described, but not in a lot of detail.  So if you aren't clear on how a particular feature works once described you will be left to find out on your own.  This happens often throughout the book.  If you are paying attention and looking at the pictures you may have no problems grasping things.  But given that this is a beginners book you would expect more detail on the way specific features of the Blender Game Engine works.  One section of the book that did stand out was the coverage of Navigation Meshes.  I haven't seen these described in any other Blender  books.

How to do simple rigging of models and use the Action Editor to animate models in the Blender Game Engine is covered.  And again is not really covered in enough detail but you may be able to figure it out.  Also covered are topics such as reacting to events such as collision, keyboard input and the like.  As are topics such as making score counters and life bars.

After the major topics are covered the book moves on to polishing your game, covering topics such as splash screens, menu and adding sounds, changing scenes, making maps ect.

Given that people who want to make their own games generally are reasonably flexible when it comes to getting around unclear topics.  You may be able to overlook the sparse explanations in this book and get around the very bad grammar and get some useful information out of it.  Though as a beginners book I just don't think the level of quality and detail is good enough.

I personally would not recommend this book if you had to pay for it, but I can see that to some people it would be a useful book.  Although I think you would get more information, more clearly presented just by doing a quick google search for Blender Game Engine videos.

It's a shame because there is a definite lack of Blender Game Engine books and this one could have been much better was it not for the bad grammar, sparse descriptions, and lack of good resources.

Review Score 50%

06 October 2012

Gorden C Fisher - Blender 3D Basics - Ebook Review

Packt Publishing asked me a while back if I would do a review of one of their recent Blender titles "Blender 3D Basics".  I said I would love to review it but then life got in the way and I got somewhat delayed in reading all the way through the ebook.  Anyway better late than never I have finished reading it and here's what I thought of it.

The first thing I generally like to do when I start to review a book is have a look who the editors and technical reviewers are.  In this books case its got a strong set of technical reviewers.  One of the names I recognized was Allan Brito of the Blender 3D Architecture website.  Another reviewer Willem Verwey is a Blender Foundation Certified Trainer Review member, and has previously reviewed Blender 2.5 Materials And Textures Cookbook a previous Packt publication by Colin Litster.  The author of this book Gordon C Fisher also has an impressive background in all things computer graphics.  So with names like that attached to this book you can expect it to be properly checked and the information verified to be right.  As far as I could tell this is one of the best produced Packt books.  No silly typos, bad punctuation or other little annoyances that sometimes appear in Packt books.  The pictures in the ebook are well laid out and very clear and in full color.  So the production side of the ebook is good.

So what about the Blender content how does that come across and get communicated?  Generally very well.

Product Specifications:
  • Name : Blender 3D Basics
  • Author : Gordon C Fisher
  • Price : £16.14 (on 6th Oct 2012)
  • Pages : 468
  • Format : EBook
 
Blender 3D Basics Cover

This book is for beginning Blender learners who want to get into understanding the basics of computer graphics and modeling, and more specifically the basics of Blender 3D.  So if you have never had any experience with computer graphics or Blender, this ebook will start from first principles.

Given the target audience of this ebook is absolute beginners, if you have a couple of years Blender experience under your belt you are not likely to get much from this book.  If you are a beginner then you will I think find this ebook very useful.

Like most of the Packt Beginner's Guide books it tends to take the approach of teaching you Blender by making you use it.  Now a lot of books take this approach also, but this one takes it a little further than normal, as the text seems as if it is aimed at being usable in a classroom environment.  There are question and answer sections, various assignments and test the ebook gives the reader as he/she progresses through the material.  I am not absolutely certain but I think this is the first time I have seen this in a Blender book from Packt.

This classroom type approach to teaching Blender seemed to work very well when I was reading the material.  If I was a beginner I would have found it useful, the step by step approach to instructing the reader and the interspersed theory and test sections worked well.

The ebook starts by going over some of the history and development of film and animation.  Giving numerous examples of how animation has progressed throughout the years, explaining some of the techniques used to give animations there more captivating qualities.

Important beginner topics such as the theory of how animation works and the all important 12 Principles Of Animation are covered one by one, covering them in enough detail, but no massive depth.

In Chapter 2 after the history lessons and beginning theory has been described, the ebook then moves on to more practical matters, covering Blender's Interface and how the user can interact with it.  The description of Blender's interface was very clear and I think a new user to Blender would have no problem understanding Blender's interface given the information in this chapter.

Chapter 3 has very quick coverage of Blender's lighting system, animation and how to use some of Blender's Color features, coordinate systems, composition rules, color depth, and other topics.  This chapter is just a brief tour of these features and in later chapters they are more fleshed out.  One stand out part of this chapter was the very good description of how the HSV color values work.  This has to be one of the simplest and easy to understand explanations of how the HSV color model works, that I have ever seen.

Chapter 4 & 5 goes over the basics of selecting objects in Blender's 3D Viewport and manipulating mesh geometry using some of Blender's standard techniques.  The section on Datablocks and how Blender uses them was very clear and will help the new user quickly get to grips with just how useful they can be.  This is a topic often skipped over in beginners books, so it was good to see it covered.  Simple coverage of layers and their uses are described.  The information in this chapter is used to build a simple boat model which is used in later chapters.  Good examples of how to use reference blocking where covered to help the reader build their boat model, and simple material and texturing methods were explained.

Chapter 6 covers creating oars and oar lock model parts for the boat created in the previous chapter.  Simple animation is created for the oars and the boat.  Use of parenting is covered and how to use it to make animations easier.  Also covered is appending of models from other Blender files, so you can make use of them in other projects.  Appending was very clearly explained.  So the end result of this chapter is a simple boat model that is animated to move with moving oars.  Good result.

Chapter 7 moves on to going through the planning stages of building a bigger more complex boat model called a sloop.  This chapter covers story boarding and shot planning, and how to use Blender's Background images feature to setup picture references from which you can model more complex things from reference.  Short but clear coverage of the differences between meshes and curves are covered and the curves are used frequently for modeling different parts of the sloop model.  Beveling and the various curve features are covered.  Surprisingly for the audience this book is aimed at more advanced topics such as tv safe areas for broadcasting animations, and interlacing field are covered.  These topics are covered clearly so will cause no problem, they just seem out of place, but none the less useful.

Chapter 8 & 9 goes into more detail on modeling the sloop and covers modeling fundamentals such as edge loops, rings and various modifiers that Blender has, the most important of these being the Subsurface Modifier, Mirror Modifier, Boolean Modifier and the spin tool.  These tools were well described and used in clever ways to show how powerful they can be when used in simple ways.  Another surprise was the coverage of Blender DupliVert feature, a useful but often skipped over feature in beginners books.

Chapter 10 takes a different approach to the previous chapters as they covered modeling of solid hard body items.  The chapter moves on to modeling more organic type items, such as landscapes, trees and oceans.  Various approaches are taken to achieve this.  Blender;'s ANT landscape generator is used, as is the Sapling Addon which is used to quickly create tree models.  How to use Dupliframes is described and is used to quickly build a pier.  Dupliframes is a rarely describe feature and it was good to see it used.  Blender's Ocean Simulator Addon is also used to created a simple ocean/river scene.  Finally the topic of groups and how Blender uses them to organise complex scenes and models is covered and groups are used to help keep things manageable as the Blender project gets more involved.  Other topics covered in this chapter were Proportional Editing and Simple Texturing.  Very packed chapter but clear and easy to get to grips with.

Chapter 11 & 12 cover improving your camera, lighting, rendering and compositing skills with Blender, going over the various keywords and terminology. Good coverage of what depth of field is and how to use it in Blender were describe as was basic compositing.  The tips of how to achieve efficient and fast rendering results were particularly useful.  Some lighting theory was covered, specifically the basic 3 point lighting techniques.
At the very end of the book it wraps up loose ends and covers very briefly Cycles, but in no great depth.

All of the chapters come with extra material and references that can be obtained from a download pack that is on the Packt Publishing website.  This download pack contains all the models at various stages of completion through all the chapters and even more information on the various topics covered in the ebook.  In some parts of the ebook the download pack is important to reference, as you get a much clearer idea of some topics after having read it.

Because of the way the book seems to be aimed at being used in a classroom type way the long lists of step by step instructions may seem a bit irritating to some, but if you take the time to work your way through all the steps it does pay off.  And if you really don't want to have to have worked your way through all the chapters one by one you can at least get the completed projects for a particular chapter from the download pack.  Though why you would buy a book like this if you were not intending to do the actual exercises is beyond me.

So all in all for the target audience of the 3D & Blender beginner this ebook I think does a very good job of getting across a lot of the important topics of 3D software and modeling.  Just remember who the target is for this ebook.

Very good book, worth it for the beginner.

Review Score 85%

03 September 2012

Pablo Vazquez - Venoms Lab 2 - Training DVD Review

I recently got myself a copy of Pablo Vazquez's "Venoms Lab 2" DVD, and since I had some spare time I decided to give it a look and see what I thought of it.

Product Specifications:
  • Name : Venom's Lab 2
  • Author : Pablo Vazquez
  • Price : €27.50 (on 3rd Sept 2012)
  • Runtime : 213 Minutes
  • Format : DVD Training Video


For those of you with good memories you will know that Pablo Vazquez previously had done an earlier version of Venoms Lab, but that was for older versions of Blender 2.4x.  This new Venoms Lab 2 DVD is a complete rewrite, this time for the most current version of Blender 2.63+.

Pablo Vazquez has created many different training products for Blender and is a very experienced Blender user, he has worked on many of Blender's Open Movie Projects, so he knows what he is doing.

Another impressive thing about this training DVD is that is that it is multi-language because it supports both English and Español.

This time around with Venoms Lab 2, Pablo goes over the process of planning, modeling, sculpting, texturing and adding fur to a Guanaco which is a small Camelid (you even get to learn new words!) like creature.

The training DVD presents all its videos inside of a web browser interface, but also allows you to play the videos from within a more advanced player such as VLC.  VLC is provided on the DVD, as are versions of Blender and all the extras, textures and Blend files needed to examine how the Guanaco was created, as well as the Blend files which are used to create the official trailer.  So pretty much all the resources you could need to follow along with the tutorials are provided.

The first videos on the DVD go over the basics of planning and preparation.  It explains in a clear way how you approach a project such as this  one and the ways in which you can make your work flow as efficient as possible, so as to avoid problems.

Once the theoretical discussions are out of the way Pablo begins to model the basic Guanaco creature.  He explains what he is doing and the keys he is pressing and why he is doing what he is,  all in a clear and concise way.

Pablo breaks up the modeling of the different parts of the Guanaco creature and goes over the process of modeling each different part.  For each part he first goes slowly and describes in detail the techniques he uses and then speeds up the videos so you are not watching him push vertices around, when an important stage is reached he puts the video back into realtime mode and explains what he is doing and why it is important.

If you have at least a tiny bit of familiarity with Blender you should not really have any problems following what he is doing, though if you have never used Blender before, you may have to click the rewind button once are twice to see what he is doing.

After the modeling is completed Pablo goes over how to use sculpting to add extra details to the model, such as creases, as well as baking normals to add even more detail while not increasing mesh geometry sizes.  The coverage of the available options for sculpting is very good and a lot of the lesser used options and described.  You won't be a sculpting expert after having seen the sculpting video but you will have a good grasp of the major sculpting options and methods.

The next section of the DVD covers how to use Blender's particle system to create hair and fur on the Guanaco creature.  This is probably the most advanced section of videos on the DVD and you really do have to be paying attention to see everything that is going on.  It packs in a lot of information, you will learn a lot of clever things in this section.  The coverage of weight painting is very clear and Pablo takes a good deal of time explaining how to use it effectively.  It really is a very good example of how to use Blender with multiple particle systems to create very impressive looking fur effects.

Once the application of fur has been completed Pablo moves on to texturing his creation to give it more realistic colouring.  Blender's UV Texturing tools are covered as is Texture Painting, all from inside Blender.  Good explanations of UV Unwrapping are covered as are UV Creases for more accurate unwrapping.  Also covered is Live Unwrapping with Pinning, a feature you don't often see explained in any great detail.

The final part of the DVD covers rigging.  It's included as a bonus addon section of videos.  Unlike the rest of the videos, these videos are created by Nathan Vegdahl, an amazing rigger who has made his own rigging DVD's for the Blender Foundation.  If you have Nathan Vegdahl's Humane Rigging DVD then you will recognise these videos, as they are from that DVD.  Although the information contained in these videos is not specific to the Guanaco creature they are still very useful as a way to rig that creature.

Note that this DVD does not cover the Blender Cycles render materials system, as Cycles does not yet have support for fur/hair, only Blenders Internal material system is covered.

So, all in all, this is a good DVD, very well produced and well explained, great update to Blender 2.6x.

Review Score 80%

10 July 2012

Nathan Vegdahl's - Humane Rigging - DVD Review

Another month and it's time to do another Blender Foundation Open Movie Workshop training DVD release review.

The Blender Foundation Open Movie Workshop training DVD are high quality training DVD's covering all aspects of production and training in relation to Blender 3D. They are the nearest thing to official/gold standard training that the Blender Community currently has access to, as they tend to be created by the people that created Blender. Each DVD is released under Creative Commons Licensing.  The sale of the training DVD helps support the Blender Foundation and helps in improving Blender.

This time the DVD released is "Humane Rigging" created by Nathan Vegdahl, the irrepressible guy who has worked on many of the Blender Foundation's Open Movie Projects and has produced many different training products.

For those who don't already know Nathan is an extremely talented Blender user who specializes in all things rigging. Which means that he is the ideal person to be producing this training DVD, as it covers rigging in Blender.

Humane Rigging - Blender Foundation Training DVD 8

Product Specifications:
  • Name: Training DVD 8: Humane Rigging - Rigging For Human Beings
  • Author: Nathan Vegdahl
  • Price: €27.50 (as of 10th July 2012)
  • Type: Video Training DVD
  • Runtime: 6 Hours (approximately)

The first thing to say about this DVD is that it only covers certain concepts related to rigging in Blender.  It will not cover how to animate the rigs you create with this DVD, nor will it cover deformations in any great detail and weight painting is only briefly demonstrated.  This is to be expected as rigging is a vast and sometimes complex topic, and trying to cover both rigging, weight painting and animation at the same time would make this DVD much longer than it already is.

What is covered are the major rigging structures and controls that are needed to make flexible rigs which can stand up to a real world production requirements of a professional animator, giving the animator the flexibility they need to get their job done.

The approach Nathan takes to do this is simple and effective, he goes over the topics he wants to teach by introducing and creating 3 character rig types.  Each different rig type explaining an important rigging concept in Blender.

The 3 different rig types are loosely ordered from simple to complex, using a process of continued refinement to the rigs to make them more flexible as new topics are introduced to the watcher.  This helps greatly when trying to get to grips with some of the more complex theoretical concepts that Nathan explains throughout the DVD.  It is important to note that Nathan does introduce a lot of theory as well as practical instruction when creating his rigs.  I found this very useful and educational.

The DVD is very well narrated and Nathan on the whole is very clear when it comes to explaining the topics of rigging.  Though rigging is a complex topic and by necessity you will have to be paying complete attention to what he is saying if you want to understand the rigs he makes.  Rigging at the best of times can be confusing but Nathan does his best to keep it understandable.

Over the course of the 6 chapters, Nathan shows you how to rig some of the major parts of a character (fingers, eyes, hands, palms, feet, legs, etc.).  He also covers using various modifiers and constraints to make the job of rigging more efficient and his rigs more powerful.

By the end of this DVD you will have good knowledge of what Rigs, Bone Constraints and Drivers can be used for.  The Bone and Driver Constraints are used extensively in Nathan's rig and his descriptions of how to use these features if very good.  Another highlight of the DVD was Nathans discussion of Intermediate Parenting and it uses.  I found this very useful once I was able to wrap my head around it.  Also the use of drivers to prevent alterations to specific rig values was very clever.

I personally think that if you are a beginner/intermediate Blender user starting out in the rigging side of things that you will learn a lot from this DVD.  Be warned though that you will be required to be paying attention and probably have to rewatch parts of the DVD repeatedly to get your head around a lot of the topics Nathan goes over.

All in all an excellent DVD, well worth adding to your collection especially if you have an interest in wanting to rig more effectively in Blender.

Review Score 85%

03 June 2012

Jonathan Williamson - Architectural Visualization In Blender 2.6 - Training Video

Recently Jonathan Williamson released a new tutorial video on BlenderCookie.com, covering how to do Architectural Visualization In Blender 2.6 using Blender Cycles rendering engine.

Since there aren't any recent architectural modeling and rendering tutorials around commercially for Blender, I was very interested in Jonathan's new tutorial. I am big fan of both hard body modeling and architectural modeling tutorials. One of the first reviews I ever did was of a hard body mechanical model. So when Jonathan contacted me and asked if I would be interest in doing a review of his new baby, I said yes.


Product Specifications:
  • Name: Architectural Visualization In Blender 2.6
  • Author: Jonathan Williamson
  • Price: $10 Monthly Citizen Membership Subscription
  • Type: Online Streaming Video/Downloadable
  • Runtime : 5 Hours
The aim of the course if the rendered results are anything to go by is to deliver a very realistic looking scene of an interior room. According to the website everything required to produce such a render will be covered in the tutorial (which is was). So hopes were high that this will be a very good product.

Given that it's Jonathan Williamson doing the Blendering, you would expect nothing less, seeing how he has a string of high quality tutorials behind him.

So off I went to BlenderCookie and signed in to the Architectural Visualization in Blender 2.6 course. Once signed in I was presented with a total of 25 video tutorials each covering an aspect of architectural visualization in Blender. You can watch the videos online or download them direct to your hard drive. I decided to download them. The downloads were very quick and reliable. The total file size of the downloaded zip files was just over 3 gigabytes. You will need either a very quick or very reliable connection to download them.

Video Listing:
 Introduction To The Series                       1 Min 14
 Introduction To BMesh                           12 Min 18
 Modeling The Main Structure                     19 Min 15
 Modeling The Windows                            29 Min 25
 Modeling The Trim                               10 Min 20
 Modeling The Stairs                             10 Min
 Modeling The Chair                              21 Min 25
 Modeling The Wall Light                         23 Min 42
 Using Linked Groups                              6 Min 19
 Using The Edit Linked Library Addon              2 Min 35
 Importing Assets                                10 Min 45
 Environment And Sun Lighting                    12 Min 33
 Using A Window Light                             4 Min 38
 Adding A Background Image                        6 Min 58
 Adjusting The Cameras                            9 Min 42
 Creating A Material Library                      4 Min 49
 Creating The Room Shaders                       30 Min 21
 Shading The Chair                                8 Min 50
 Shading The Wall Lighting                        1 Min 21
 Shading The Room                                13 Min 52
 Scenes And Render Layers                        23 Min 02
 Compositing The Render Layers                    9 Min 17
 Color Adjustments With Nodes                    15 Min 23
 Adding Volumetric Lighting                      16 Min 20
 Final Editing With Photoshop                    10 Min 17
 

Of the 25 videos the first video is an introduction and goes over what will be covered in the rest of the videos.

The second video "Introduction To BMesh" has a brief rundown of the important changes that were introduced in Blender's new mesh system called BMesh which has recently been added to Blender's SVN trunk and will be available to all Blender users when Blender 2.63 is released.

This course requires what is currently a beta version of Blender 2.63, as the features of BMesh are used at various places within the tutorial. BMesh's major feature is that it allows for NGONS which are faces which have more than 4 edges, as well as numerous other useful features. Jonathan provides links to the appropriate Blender builds on the course website, so even if you do not have the latest and greatest version of Blender you will be able to get it from the links provided. I found the explanation of how BMesh worked and what it means for Blender users to be clear and easy to understand, with the important concepts explained very well. If you had no clue as to what BMesh was this video really helps. It's hard for me to remember sometimes that a lot of Blender users never use development/beta versions of Blender and may be totally unaware of BMesh and its long, long history of getting to the Blender public at large.

After the whirlwind tour of BMesh, the third video "Modeling The Main Structure" gets into the real work of constructing the interior room. In preparation Jonathan first goes through correctly calculating and using the right scales to model in with Blender. Explaining why it is important and laying down some simple rules to make sure scale is accurately maintained throughout the rest of the project, as well as highlighting some potential pitfalls that can be encounter by Blender users when modeling with accurate scaling. Thankfully he models using the Metric system and bypassed the crappy imperial system. Which should make things much more accurate and easy to do, given that Blender's current unit system is not consistently applied correctly with Blender own scale conversion system. Once the unit system is out of the way Jonathan moves on to creating a basic floor plan layout of the interior room. At this point he takes some time to explain how object scale can be distorted when scaling things in Object Mode and makes it very clear how to fix it, so as not to get caught out later on.

For his preliminary floor plan design layout he uses the grease pencil very effectively to quickly sketch the layout of the major structural parts of the room (ie window opening, stair locations etc). Once the grease pencil work is completed the mesh modeling actually starts. Here he start by cutting in a stairway in the floor plan using various features of BMesh, specifically the new knife tool.

The knife tool has been improved a lot in the BMesh builds of Blender. It was at this point that I was surprised as I learned that you could constrain knife cuts using the C key. Makes the video worth getting just for that reason alone for me. Extensive use of snapping is demonstrated to achieve accurate modeling. Once the basic stair cutouts have been done Jonathan moves on to constructing very basic walls and windows. Once this is done the basic general block structure for the interior building is complete and we move on to the next video. Excellent video overall, clearly explained and I actually learned something about the new knife cut and constraints!

The fourth video "Modeling The Windows" covers unsurprisingly modeling the basic structures that form the windows of the room, the support beams and other such things. At this point also the initially constructed block room is separated out into different parts. Those part being the floor and the windows. This shows good use of the separate tool and keeping parts organized for later stages of the construction project. Good simple methods for positioning an objects origin in Edit Mode are also demonstrated on the newly created support beams which aide in scaling the object more accurately and efficiently with Blender. This is good because people often get caught out when trying to position things accurately when switching between Object Mode and Edit Mode and knowing where your object origin is and how to control it really can speed things up. There is also good use of Blender's face angle display feature, shown when trying to accurately rotate the support beams, as was the use of accurate snapping, both of which are very important when doing this kind of modeling. Jonathan uses and demonstrates linked duplication and the repeat command to duplicate the support beams accurately. Another notable thing to me was the demonstration of Custom Transform Orientations, as they are very useful for architectural modeling and make creating the support beams much easier than it otherwise would have been. Custom Transforms are often not understood so this should help Blender users get to grips with them. After the support beams Jonathan moves on to modeling the window struts and lower and upper window trim, using similar techniques to those used when modeling the support beams. By the end of this video the major structural support parts of the room are completed).

Video number five "Modeling The Trim" covers modeling the trim/baseboard/skirting board that runs along the wall at floor level. A new modeling technique is used to to do this, by using two curves, a path curve and a profile curve. The path curve uses Blender's Bevel Object feature to take the profile curve that Jonathan shows you how to create and uses it to form the cross section of the baseboard path. Jonathan's explanations were clear and easy to understand. As was his explanation of how vector curves work and how to interact with them. By the end of this video you have a cleanly modeled trim along the floor which was quick to make and it is very easy to alter both the path it takes and the profile shape of the trim, should you wish to have something different for your project.

Video number six "Modeling The Stairs" models a standard set of stairs using standard measurements as you would find with real stairs. The stairs are created using the same techniques as were used in previous videos with the added use of Blender's Array Modifier feature to accurately offset and rise the stair treads. The tread nose (the part the generally juts out from the top of a stair) of the stairs was even modeled to give them an even more realistic look. The stairs were modeled efficiently and with good use of snapping for quick positioning. Occasionally in this video Jonathan would revert back to using imperial measurements this did happen often and was not really important in the video.

Video number seven "Modeling The Chair" is the first of a few videos which go over how to model smaller items/assets that will eventually end up placed in the room that was constructed previously. Since there are a lot items (called assets) in the video tutorial Jonathan goes over modeling just two of them, the chair in this video and a lamp in the next one. All the other items were obtained from www.blendswap.com. www.blendswap.com is an excellent model repository for sharing Blender files, well worth checking out if you want to see a vast assortment of freely available Blender models.

On starting to model the chair Jonathan opens a brand new Blend file and models the chair separately from the rest of the room. The chair will get linked in later using Blender's Append and Linking feature, which is described later. The chair model is measured and created to scale. Jonathan uses a good technique of using a bounding box to more accurately work out what the eventual dimensions of the created chair will be. He also makes good use of the Display Properties Panel to show the bounding box in a different display mode, so that it does not get in the way while modeling the chair. The chair is constructed using various combinations of extrusions and edge loop cuts and edge sliding, all clearly described. Two modifiers were used and explained in the construction of the chair, the Mirror Modifier and the Subdivision Surface Modifier. Soft chairs like the one being modeled in this video generally have a more rounded soft organic shape when it comes to their surfaces. This is achieved using Blender's Subsurf Modifier, which Jonathan takes time to explain and shows when and how it should and should not be used. He also highlights possible pitfalls of having internal faces present when using the Subsurf Modifier and how to fix it. Using various techniques Jonathan shows how to add the appearance of seams to the chair to make it look softer and more realistic, as well as how to add extra faces when needed to achieve that desired soft effect. Good use of the CTRL++ feature of Blender is shown (Grow selection). Even though this video packed in a lot of information in a short amount of time it was all clearly explained as needed and resulted in a very simple chair model that looked very impressive. He also showed how asymmetric modeling can be used to make models look less computer generated and regular, improving their realism. Impressive video.

Video number eight "Modeling The Wall Light" used all the same techniques as previously describe to produce a stylish but simple wall light, but also included some new features that were describe clearly by Jonathan. Those features were Normal recalculation, High Speed Extrusion using Ctrl+Left Mouse Button clicking, the Edge Split Modifier, Solidify Modifier, Creases and Seams. I liked the use of the Edge Split Modifier with Mark Sharp combined with Creases to reduce the total amount of needed geometry in terms of controlling edge loops for small items such as this. Also it helps to make people aware of the power of creases & sharp edges when combined with the Edge Split Modifier. Just using these few basic features Jonathan was able to construct a lamp that looked a lot more detailed than it actually was. After the geometry of the lamp was finished Jonathan moved on to doing a basic form of rigging on the lamp so that its component parts could be moved and repositioned easily. This was achieved using Blender's Armature system. The use of the Armature system to attach the various bones to the various bits of a lamps mesh geometry was clearly and quickly explained. Weight painting was not covered but it was not needed in this case. Finally bone transformation locks and basic parenting were also used and explained, all combining together to give a lamp that was very easy to manipulate correctly without any bad movements. Yet another feature packed fast moving chapter with a lot of new information within it.

Video number nine "Using Linked Groups" takes the previously created and rigged wall light and goes through the steps needed to import that model into your room model by using Linked Groups to keep the linked models both organized and easier to link into a scene. The effects of linking a model and what that means are all clearly explained and Jonathan demonstrates how altering the original model also alters the linked in model in the room. Because the wall light model also had a rig attached to it Jonathan also explains how to use Blender's Rigging Proxy system to allow the linked in models to alter their rig bone positions. Blender's Rigging Proxy system is often skipped over so it was a surprise to see it explained. This will surely help when you need to import rigged objects that need to be amenable to adjusts in their rigs on a case by case basis. Another excellent video, making what could potentially be a difficult topic easy to grasp.

Video number ten "Using The Edit Linked Library Addon" Is a short but interesting video which covers how to use an Addon written by Jason Van Gumster which allows for the quick editing of original linked in files (assets) in Blender with a click of a button. Being able to alter original linked in files really helps when you have a lot of linked asset files, and this Addon makes the whole process so much easier. This was another short video, but a very useful one as this Addon is a great time saver.

Video number eleven "Importing Assets" is an extension of the things learned in the previous two videos. It covers importing all the other assets which are used in the scene and covers the topic of positioning objects for good visual composition. Specifically how to position the imported assets such that they feel right and give the correct visual focal point or eye flow for the scene. Jonathan imports the main objects showing how to do it and what to take into consideration. The rest are imported with the video paused and once imported the video is started up again. This was a short and simple video but still useful for the information on composition it gave. Also it showed the usefulness of the Edit Linked Addon as it was used to correct a mistake in an object import.

Video number twelve "Environment And Sun Lighting" covers setting up materials such that they all render with clay material. This is used to test how the scene will look as a whole when lighted using sky textures from the world settings. Blender Cycles node system is demonstrated and it seemed very clearly explained to me. Good descriptions of how to use the Sky Texture Node setup were gone over, and Jonathan showed how to mix various colors with the Sky texture to get a more colorful lighted scene. After having the light how he wants Jonathan uses a sunlamp to create shadows and again explains clearly how to set that up to get good shadows and color mixing. So another short chapter but full of important information.

Video number thirteen "Using A Window Light" is related to the previous video in that it also covers lighting but this time it's a different type of lighting, using a plane mesh object to act as an emission light source. Used primarily to get around certain control issues with lighting using only world and sky texture lighting. Also this video covers how to make this mesh light not block out the effects of the previously configured world sky texture lighting. This is done by using and changing the Ray Visibility settings in Cycles. All of this is explained by Jonathan. The end result is that we end up with a nicely lighted scene that is both lighted by a Sky Texture and an light emitting plane which covers our windows but does not block other light sources.

Video number fourteen "Adding A Background Image": Up until this point the view out of the window in the room that has been constructed was totally empty, but in a real view the window would look out on something. So Jonathan goes over how to add a background image texture to the scene and position it such that it looks like a real world view outside of the window. This is achieved using the Image As Plane Addon and Blender Cycles Light Path feature to create a shadeless material that is usable in Cycles. Jonathan explains all these features clearly. Though I was a little confused about the Light Path setup, it was simple enough to achieve and it could just have been me not paying attention. Another short video but the information on setting up shadeless image textures was very useful as it was not immediately obvious to me how I would have achieved this. Good video.

Video number fifteen "Adjusting The Camera" covers setting up the camera, and some of its important settings precisely. as up until this point the camera has only been positioned very roughly. To achieve the proper camera setup Jonathan uses the standard tools such as rotation and translations of that camera and also uses two less well known features that a Blender camera provides. Those being Compositions guides set to "Rule Of 3rds" mode and the Cameras shift feature. Most people will know what composition guides are for, but less probably know about the Camera Shift option. I just assumed it was for offsetting the camera slightly in the Viewport when rendering a scene, but Jonathan showed its true power in correction for perspective distortion. So this is another video where I learned something and it's probably worth the price on its own. Excellent video.

Video number sixteen "Creating A Material Library" covers how to create a simple scene which will be used to test various material settings to see how they look when rendered with the same light setting as you would have in your original room scene. It is also used as a storage location from which the materials can be taken from and linked into other scenes. This is made easier by Jonathan demonstrating how to import node groups which have the sky texture setup in them and by linking in the sun lamp from the original scene, thereby making sure that both the test material scene and the original room scene are lighted identically. Short video but an excellent way of testing material and making sure they will look right when used in a live scene. This video forms the first part of the next major topic covered in this tutorial, that of materials and shaders and how to set them up to get the desired results.

Video number seventeen "Creating The Room Shaders" this video covers creating the various shaders needed for the constructed room, which will later be linked into our scene. The first shader created is the wood floor shader. Jonathan shows how to use the Cycles Nodes to get the wooden floor effect that is required. Using textures that have been made available with the tutorial Jonathan goes over how to apply textures for color, spec and bump mapping using Cycles Node system. UV texturing is nicely explained, if a little quickly. Another handy tip I learned was that Node can be constrained along the x and y axis. Being able to change how the scale of UV Mapping is displayed on objects using Cycles is fully covered. The node setups covered are well explained and very flexible in terms of how much control they give you over your final outputted shader. Nice tip of how to alter the tint of the floor texture using Cycles Node was very useful also. Cycles Node Groups are also covered in the tutorial. Jonathan takes some time to explain how these work and what they are used for.

After the floor shader Jonathan moves onto the wall shader. But instead of using the Cycles Node system he uses the Material Panel system that is also available in Cycles. Which again is handy to know. Next up is covering how to shade the wooded beams. He does this by using the settings from the previously created wood floor shader, showing how sharing settings can speed up shader creation. Jonathan works his way through all the other shaders (glass, metal) in a similar way and describes them all very well. The end result of creating these shaders was very realistic looking. A fabric shader was also created, which again the end result looked very good. The Cycles Node system makes creating these realistic shaders so easy that Jonathan almost had nothing to say, just a few nodes and some simple steps and boom, realistic shaders!

Video number eighteen "Shading The Chair" in this video the previously created shader materials are used to add a material to the chair model that was modeled in an earlier video. Only at this point the chair has not yet been UV Unwrapped so can't be UV Textured, so Jonathan demonstrates how to UV unwrap the chair model. Again it's clearly explained and I had no problem following. Handily Jonathan highlighted a possible bug with long file path names, which should save some people trouble.

Video number ninteen "Shading The Wall Light" covers shading the wall light that was previously modeled. Since this is a very basic shading object. The materials are just linked in from the ones you made in your material test file. Very short video but again easy to understand.

Video number twenty "Shading The Room" covers similar topics as were covered when shading assets earlier only this time it covers shading the major room structures, the floor, walls and stairs are all shown being shaded. The rest of the items in the room are shaded also but not shown on the video, as it is the same process of shading throughout. Other interesting highlights of this video were the coverage of a material changing Addon and the use of Blender's layers system to make shading the important parts of the scene easier and more organized. Excellent video.

Video number twenty one "Scenes And Render Layers" this video marks the start of a completely different phase in this tutorial process. All the physical modeling and texturing of geometry has been completed by this point. Things move on to the more post production oriented side of architectural rendering and visualization. This video covers how to split up and organize your created scene using a combination of render layers and separate scenes. Jonathan describes how he is going to organize his scenes and why, as well as describes some of the important render settings that will be used to get the best results for his scene. Render Layer manipulation and scene management within Blender can be a complicated and difficult to follow subject but Jonathan managed to explain it very well and I was able to understand what he was doing. A good tip I liked on this video was the simple but not often used button which allows you to delink 3D Viewport layer buttons from the render layer version of the same buttons. He also covered BVH caching and how to speed up scene rendering with this option. Another impressive part of this tutorial was the method he used to capture reflections on a window for later compositing in Blender. An advanced video but very well explained, though you may have to watch it more than once to get it.

Video number twenty two "Compositing The Render Layers" takes the previously organized render layers and scenes from the last video and goes through how to render those elements and finally composite them together to give a scene that looks like one whole scene rather than a collection of different parts. Jonathan clearly shows how to take those rendered images and use them in the compositor, and shows some of the new features available in newer development builds of Blender Cycles. Probably about the only minor mistake I saw was that like almost everyone else Jonathan incorrectly said that the compression slider for PNG images effects image quality, this is incorrect it just effects image size. not output quality of the image. PNG is a lossless image format after all. This would effect quality if it was a jpg or some other lossy format. Either way it's a insignificant issue and has no effect on the final results. Excellent video.

Video number twenty three "Color Adjustments With Nodes" is where Jonathan covers how to do color correction on his composited render. The node setup he uses are explained very well, and it is a simple setup, he does not go crazy with many different nodes, just the basic ones for very good final results. One thing that I did like a lot was Jonathan's discussion of the Multilayer OpenEXR file format, and how to use it to preserve the ambient occlusion pass as an image, rather than having to depend on Blender internal render buffers, or less suitable file formats. You could do entire video series just on color correction so Jonathan did a great job in cutting out all the fluff here. Excellent video covered only what was needed, nothing superfluous.

Video twenty four "Adding Volumetric Lighting" was a bit of a surprise to me, because Jonathan actually goes all out to get something approximating atmospheric light dispersion. Most other tutorials either skip doing this entirely or just add a glow effect to highlights. By doing volumetic lighting using Blender internal render he was able give a lot of extra realism to his scene. I am not well up on the volumetric settings, so I can't say why changing the Lighting on the volumetrics to shadow gets the light ray effects that it does but it certainly works, so again I ended up learning something new. So all in all another excellent video even if parts of it I was not entirely clear on why it worked, I probably need to go back and watch it more times.

Video twenty five "Final Editing With Photoshop" this is the final tutorial and it combines the previously made volumetric light rays into the room scene, does some color cast tweaks and shows you how to clean up fireflys. While it would have been better to have completed this stage in open source software like Gimp, it's very easy to convert what was done in Photoshop to Gimp (which does make me wonder why Jonathan did not use Gimp in the first place). So another short but clearly explained video, covering the final touch ups needed to make an image truly polished.

So for those of you who made it all the way through this long and rambling review you can probably tell that I thought on the whole this set of video tutorials was excellent, if not go count the number of times I said excellent in this review. What problems I did find were so small as to be not worth worrying over, as far as the content of the video tutorials is concerned. It's an amazing piece of work. Jonathan Williamson should give himself a big pat on the back.

On a slightly less certain note, I know that some will not like having to subscribe to a Blender Cookie Citizen membership just to have access to this tutorial as good as it is, but I think it is worth it as Blender Cookie does put out a lot of citizen tutorials, so you would likely over a year get several high quality tutorials not just including this one. Which I think makes it worth the subscription. It may or may not become available as a standalone product you can buy outright, I just don't know.

Brilliant product, if you can subscribe you should!

Review Score 90%

George Maestri - Blender 2.6 Essential Training - Training Video

It recently got very busy here and I have 2 reviews of Blender based training products to review. The product reviewed in this article is:


Product Specifications:
  • Name: Blender 2.6 - Essential Training
  • Author: George Maestri
  • Price: $25 (Monthly Subs)
  • Type: Online Streaming Video
  • Runtime : 7 Hrs 26 Mins
This is an online steaming training video course covering the basics of using Blender 2.6. It was authored by George Maestri, who I haven't heard of before, but he narrates very well and appears to be reasonably good with Blender. The website that hosts this training material is lynda.com, who are a large and popular educational training site. They have a combination of subscription models as well as being able to purchase training DVD directly. Currently this product is not available as a DVD, so it can only be purchased by having a subscription to the lynda.com site.

The videos in this course are aimed squarely at the beginning Blender 2.6 user. Each short training video is designed to explain the basics of one particular specific feature of Blender very quickly to get the watcher up to speed as quickly as possible.

Tutorial Listing:
 Introduction
     Welcome                                             01m 22s
     Using the exercise files                            00m 28s
     Downloading Blender                                 00m 34s
     Using Blender on a Mac                              00m 42s
     Using Blender on a laptop                           00m 36s
 
 1. The Blender Interface
     Overview of the Blender interface                   06m 06s
     Understanding 3D view windows                       05m 23s
     Navigating in 3D space                              06m 35s
     Configuring user preferences                        06m 24s
     Creating custom layouts                             06m 04s
 
 2. Selecting and Translating Objects
     Selecting objects                                   06m 12s
     Moving objects                                      04m 35s
     Rotating objects                                    02m 48s
     Scaling objects                                     02m 16s
     Understanding transform orientation                 03m 53s
     Changing an object's origin                         05m 27s
     Selecting pivot points                              03m 22s
     Using Snap to move objects precisely                03m 56s
 
 3. Modeling
     Creating mesh primitives                            06m 36s
     Selecting vertices, edges, and faces                04m 48s
     Editing mesh objects                                07m 39s
     Proportional editing                                03m 52s
     Sculpt mode                                         04m 45s
     Working with edges and edge loops                   03m 42s
     Extrusions                                          05m 18s
     Smooth shading objects                              02m 23s
     Subdividing meshes                                  05m 12s
 
 4. Advanced Modeling
     Working with modifiers                              05m 52s
     Working with subdivision surfaces                   03m 48s
     Creating a simple creature                          07m 54s
     Symmetrical modeling with the Mirror modifier       08m 21s
     Joining mesh objects                                03m 37s
     Stitching vertices                                  04m 52s
     Finalizing a simple creature                        04m 48s
     Creating text                                       03m 29s
     Boolean tools                                       02m 59s
     Vertex groups                                       04m 51s
 
 5. Staying Organized
     Using the Outliner                                  08m 22s
     Using layers                                        04m 30s
     Creating groups                                     02m 48s
     Working with scenes                                 04m 02s
     Creating hierarchies                                02m 54s
 
 6. Applying Materials
     Assigning materials to objects                      08m 04s
     Diffuse shaders                                     06m 47s
     Working with specularity                            05m 56s
     Using the Ramp Shader options                       09m 45s
     Additional shading options                          02m 37s
     Creating reflections                                08m 29s
     Adding transparency and refractions                 06m 49s
     Subsurface scattering                               05m 59s
 
 7. Adding Textures
     Adding a simple texture                             06m 11s
     Using bitmaps                                       06m 53s
     Mapping textures in the UV Editor                   08m 28s
     Using UV projections                                05m 56s
     UV mapping a character                              06m 11s
     Fine-tuning UV mapping                              06m 07s
     Creating Bump and Normal maps                       03m 15s
     Displacement mapping                                03m 48s
     Using the Node Editor                               04m 59s
 
 8. Working with Light
     Adding lamps to a scene                             08m 44s
     Fine-tuning ray-trace shadows                       04m 32s
     Using spot lamps                                    04m 20s
     Fine-tuning buffer shadows                          06m 19s
     Using Hemi lamps                                    02m 32s
     Working with Area lamps                             05m 17s
     Creating sky and ambient light                      04m 49s
     Adding background images                            03m 19s
     Creating sunlight                                   06m 06s
     Ambient occlusion                                   07m 11s
 
 9. Cameras and Rendering
     Working with cameras                                04m 47s
     Creating camera targets with constraints            03m 43s
     Render properties                                   05m 07s
     Rendering animation                                 05m 13s
     Adding motion blur                                  04m 10s
     Creating depth of field                             07m 08s
 
 10. Basic Animation
     Understanding the Timeline                          04m 03s
     Animating objects                                   06m 26s
     Animating properties                                04m 00s
     Editing animation in the Graph Editor               08m 36s
     Using the Dope Sheet                                04m 53s
     Path animation                                      04m 32s
 
 11. Character Rigging
     Facial animation using shape keys                   04m 40s
     Understanding armatures                             06m 02s
     Fitting an armature to a creature                   07m 23s
     Deforming a character with an armature              03m 49s
     Setting up inverse kinematics                       03m 53s
     Controlling the hips and body                       02m 01s
     Animating in Pose mode                              02m 47s
     Creating a test animation                           09m 24s
 
 Conclusion
     Goodbye                                             00m 15s
 

While you won't become a Blender expert with these video the numerous amount of videos are extremely well produced and for the most part explained very well by the author.

All the exercise files which the course references throughout the videos are available as part of the course and indicated clearly when you need to reference theme. Though I found that I did not need to reference the exercise files as the author explained what he was doing on screen for each different video.

With the short runtimes of each of the videos this has enabled the author to pack in a lot of different bits of information and tips and trick when using Blender various features. So although you won't get in depth information from the videos you will get most of the major salient pieces of information and techniques you will need to get going in Blender.

There are a few small mistakes and omissions in the course as a whole, but they are small not really important (mostly terminology issues and not mentioning certain often used features). The one thing that I would really like to have been included in the tutorials was coverage of Weight Painting for armature attachment. Armature attachment was covered but only by using Parenting and automatic methods. Please also be aware that Cycles is not covered in this course because when it was released Cycles was not available in Blender, but Blender's internal render engines is still plenty powerful enough and flexible for most things regardless of what all the Cycles acolytes say!.

So if you are a beginner and you want to get the basics of Blender down as quickly as possible this is a good well narrated online course that will do well. The biggest major downside for me is that at the moment the product cannot be purchased without subscribing. This may change in time and they may release a DVD product that does not require subscribing (they have done this with other Blender products).

Review Score 70%

Paul Friedl - The Leather Book Animation - 3D from Start to Finish - Training Video

It's been a slow time for me recently as far as Blender tutorial reviews go, so when I found out about a new video tutorial, off I went to go and have a look at it.

In this video tutorial Paul Friedl takes the viewer through the steps involved in creating a photo-realistic Leather Book Animation with simple animations and texturing techniques.

I haven't seen many commercial Blender video tutorials which cover the creation of the smaller more mundane objects such as books like this one. I have seen plenty of character modelling and larger hard body things such as cars and helicopters etc., but not smaller items.

To me these smaller and mundane objects are just as important to be able to create, so a tutorial such as this one is very welcome.


Product Specifications:
  • Name: The Leather Book Animation - 3D from Start to Finish
  • Author: Paul Friedl
  • Price: $19 (3 Dec 2011)
  • Type: Downloadable Video
  • Runtime : 214 Mins
To download the video tutorial I went to the 3D Animation Plus website which I had not heard of before. So I checked out the About section of the website and found out that it looks to have been setup recently. Looks very organised and well designed. If the about page is to be believed then it will be a good web site to keep an eye on as there will be other tutorials to follow. Paul Friedl owns the website and has been working in 3D for 6 years, so is not a 3D newbie.

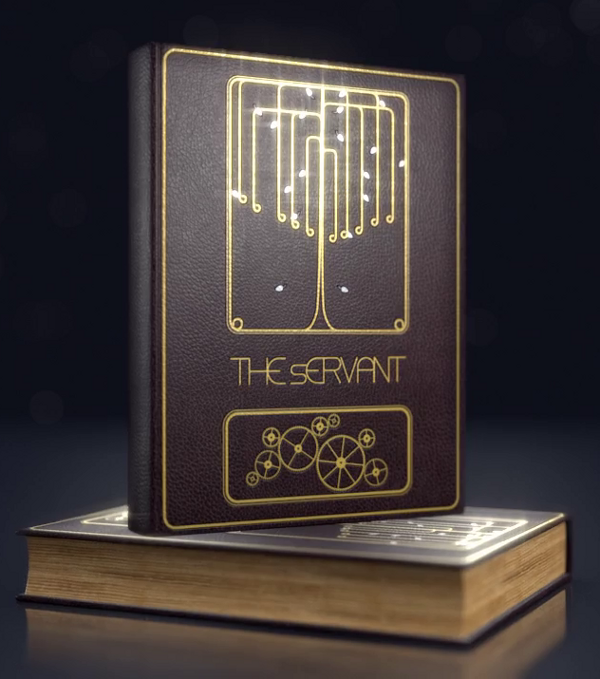
Irrespective of how long Paul has been doing 3D the important question is, how good a video tutorial is this? I would have to say that on the whole the tutorial is very good and the end result (shown in the image) looks very good to my eye.

The downloading of the videos was very easy and hassle free for me. The downloads are very large so you will need a reasonably fast network connection.

Once the downloads had completed I was presented with an archive file which I extracted and this left me with 3 directories. The first directory named "The Leather Book: Scene Files" contains all of the resource files that you will need if you want to follow along with modelling the Leather Book Animation. All textures, soundtrack, blend files and even the fonts used are supplied. These resources are very useful and are good examples to use.

The other two directories contain the main Leather Book Animation video tutorial files and also a Blender Basics video tutorial for those new to Blender, which is used to get the new Blender user up to speed with using Blender. So even if you have never used Blender before you should be able to understand what is being described, if you first watch the supplied Blender Basics videos.

The tutorial videos are organised into 16 parts, and go in order from start to finish in creating the Leather Book Animation. There is also a bonus video showing the process of making weathered old looking leather.

Sections Listing:
  • Introduction
  • Modelling And UV Export
  • Layout Design In Inkscape
  • Layout In Blender
  • Layout Animated In Blender
  • Photo-realistic Texturing In Blender
  • Applying Textures In Blender
  • Compositing In Blender
  • Creating Camera Rigs In Blender
  • Camera Animation
  • Improvements For Shot 1
  • Improvements For Shot 2 And 3
  • Improvements For The Depth Of Field In Shot 3
  • Video Editing In Blender
  • Outro
  • Worn And Damaged Leather
The narration of the videos is very clear as Paul takes his time explaining what he is doing and why. Also on a more technical level the encoding of the videos is clear and easy to see. Blender is used for all the mesh modelling, compositing, animations and video editing done while creating the book, but Blender is not the only piece of software used. Other popular open sourced software is used. Gimp is used to create the initial base textures which are later used in Blender to creature realistic leather. Also used is Inkscape to create the cover art that is on the front of the finished leather book.

I found the use of Blender, Gimp and Inkscape very informative as to how powerful a combination they can be when creating products such as this book animation. The Gimp coverage will be extremely useful to Blender users for creating base textures. On the mesh modelling side of thing Paul uses very simple modelling methods which are very easy to follow but he uses these simple modelling methods to create very effective results. Good coverage is given to properly UV Unwrapping the modelled meshes.

The animation sections of the tutorial are good but somewhat rushed, but are still useful for learning how to do basic animation. It would have been nice to have Paul explain in more detail how to control which camera is used for shot output (with features such as Camera Marker Binding). However the method he used still works.

The compositing section of the video is very good, extensive explanations are given of the processes used to composite together the previously created Gimp textures. This was my favourite part of the whole video as lots of simple but very clever uses of the Compositor were described. It really shows the power that the compositor has.

So in closing, this is a really good product well produced and if you are a Blender beginner or intermediate level user you are bound to find something of interest to learn. It's always good when a new company starts producing Blender materials, so hopefully it will be worth keeping an eye on the website for new tutorials.

Review Score 78%

Jonathan Williamson - Chracter Development In Blender 2.5 - Book Review

I have been a little busy lately and it has been a while since my last Blender book review, and since I didn't want to put of my review of Jonathan Williamson's newest book "Character Development In Blender 2.5", I decided I would put the hammer down and make some time to read through his book, I was glad I made time.

Those of you who have been wandering around in the world of Blender for any length of time will no doubt recognize the name, as Jonathan is one of the people that produces such great video tutorials at www.blendercookie.com.

This is not the first time I have reviewed tutorials from Jonathan, he also previously did excellent video tutorials on character modeling.


This time around instead of tutorial video Jonathan has produced a book covering some of the techniques and tools required to create a character mesh which can then be used in the later stages of a workflow pipeline (texturing, rigging, compositing, etc.

Product Specifications:
  • Name: Character Development In Blender 2.5
  • Author: Jonathan Williamson
  • Price: $26.77 (26 Sept 2011)
  • Type: Book
  • Pages: 496
The book has a broad audience, if you are a complete Blender beginner you will be able to pick it up and follow along with ease, and if your an intermediate level Blender user you will find topics covered that will be of interest to you also.

The start of the book covers the very basics of Blender and it's interface and spends a good deal of time explaining the fundamental features of Blender as well as general concepts of 3D and 3D modeling for those completely new to 3D. After the basics of Blender's interface are covered the books quickly picks up pace and keeps up the fast moving descriptions throughout the book.

The second part of the book is a rundown of some of the most important features of Blender that will be used throughout the rest of the book. Here we get simple and clear explanations of Blender's various mesh features, what modifiers are and how to use them. Also covered in this section of the book are Blender's Sculpting tools. The descriptions and examples used to describe how a user can use sculpting is one of the clearest I have come across especially in a printed book. The sculpting chapter to me is one of the stand out chapters, worth the price of the book alone. So often in printed books it can be difficult to properly describe the effect of the various tools used while sculpting but Jonathan does an excellent job.

One of the ways he manages this is by use of many, many pictures. This greatly helps when trying to interpret instructions given in the book and greatly speeds up how quickly things can be described to the reader. On the whole the quality of the pictures is very good and rarely did I have any problems figuring out what I was supposed to be doing, though there were occasional times when I had to go back and take a longer look at the pictures to see what I was supposed to do, this happened very rarely. The combination of clear textual descriptions and a vast number of pictures made things easy to follow. The only criticism I have as far as the pictures in the book go is that it would have helped a lot if they had all been in color, but for the most part this did not matter.

After the tools that are going to be used have been described the book then moves on to its third part, construction of your character. This third part forms the majority of the rest of the book. Topics such as making a block/rough character to later use to make the more detailed version of the character are covered. Both organic modeling in terms of the female character and her cloths are covered, as is hard body modeling for items such as jewelry and weaponry. So weather you prefer to do hard of sort body modeling both are covered. Sculpting introduced earlier in the book used extensively and Jonathan really shows the power it has in giving extra detail to a model.

The model that is created throughout the book is one that was created in concept art by David Revoy another well known Blender artist. As ever David's concept art is really great and helps make modeling the character described in the book easier. All the support files for both the finally created character and David's concept art are all provided on the DVD and can be downloaded from the books website.

One thing that probably should be made clear is that Jonathan explains something once earlier in the book and then expects you to remember what he said, you will get told how to carryout particular tasks once, then you are expected to use what he explained previously in later parts of the book. This is helped greatly by referring the reader back to various sections of the book, and the multitude of pictures. Because Jonathan doesn't repeat himself you tend to get a lot done in a short amount of time. There is very little in the way of press this button click, that key, unless it hasn't been explained before in which case Jonathan goes over the particular keys and their functionality.

After the majority of the character modeling tasks have been completed Jonathan runs through some extra steps to make the resulting render even more useful, covering both lighting and rendering settings. A section I really liked from this part of the book was the discussion and demonstration of how to use the Retopology feature that Blender provides. Very few people take the time to properly explain its usage, at least in books, as this is often easier to show in video form, Jonathan manages it well.

For the final part of the book Jonathan covers UV Unwrapping and how to apply Normal Map Baking to the finished character. UV Unwrapping was clearly explained as was baking Normal Maps. Just like the rest of the book there are numerous pictures to help keep things clear.

Given that books are a textual medium in can be difficult to describe and demonstrate certain features of Blender, Jonathan has seen this potential problem and has also provided a collection of videos on the DVD and also they are available on the books website. The videos go into more detail about specific topics covered in the book. These videos would be worth the price of the book alone, they are very informative, and if you find the book's text moves to quickly for you these videos should really help.

Excellent book well worth adding to your collection especially if you are a beginner or intermediate level Blender user, or you are a bit rusty with your character modeling skills.

Review Score 80%

Lee Salvemini - Ninja Character Creation Volume 2 - Rigging - Tutorial Video Review

CGMasters.net recently contacted me and asked if I would do a review of their Ninja Character Creation Rigging tutorial video. This is the second tutorial in their planned to be four part series on aspects of the character creation process using Blender . Given that I was so impressed with their previous Character Creation videos, I decided I would, so off I went to download the video from the download link they sent me.


Product Specifications:
  • Name: Ninja Character Creation Volume 2 - Rigging
  • Author: Lee Salvemini
  • Price: $60 (3 Sept 2011)
  • Type: Downloadable Tutorial Video
  • Length: 9 Hours 40 Min Roughly
Chapter Sections:
  • Bonus Chapter 1 - Welcome to Blender 2.5 - (Runtime 14Min 55Sec)
  • Bonus Chapter 2 - Blender's Armatures - A Crash Course - (Runtime 15Min 11Sec)
  • Chapter 1 - Creating The Skeleton - (Runtime 8Min 36Sec)
  • Chapter 2 - Creating The Proxy Mesh - (Runtime 31Min 56Sec)
  • Chapter 3 - Rig Overview - (Runtime 15Min 52Sec)
  • Chapter 4 - Head Rig - (Runtime 14Min 49Sec)
  • Chapter 5 - Arm Rig - (Runtime 29Min 49Sec)
  • Chapter 6 - Hand Rig - (Runtime 23Min 39Sec)
  • Chapter 7 - Leg Rig - (Runtime 19Min 32Sec)
  • Chapter 8 - Foot Rig - (Runtime 22Min 22Sec)
  • Chapter 9 (Part 1) - Spine Rig Standard Version 1 - (Runtime 8Min 57Sec)
  • Chapter 9 (Part 2) - Spine Rig Advanced Version 2 - (Runtime 27Min 18Sec)
  • Chapter 10 - Accessories Rig - (Runtime 56Min 42Sec)
  • Chapter 11 (Part 1) - Eye Rig - (Runtime 35Min 7Sec)
  • Chapter 11 (Part 2) - Blend Shape - (Runtime 39Min 55Sec)
  • Chapter 12 - Custom Properties - (Runtime 57Min 5Sec)
  • Chapter 13 - Vertex Groups And Weight Painting - (Runtime 129Min 48Sec)
  • Chapter 14 - Rigging With Cloth Simulation - (Runtime 15Min 7Sec)
  • Chapter 15 - Rigify - Auto-Rigging System - (Runtime 13Min 54Sec)
The first thing to note is that the downloadable version of these tutorial videos is very large, so you will need a reasonably good internet connection to download it. I found the download rate very quick and the reliability of the download very good. There were no dropped connections and all the files downloaded correctly. If you do not have a good enough connection to the internet then you can also order a DVD version of the content which is identical to the downloadable version.

After having downloaded the files and extracted their content, I opened the index page in my web browswer and was presented with a very neat and tidy interface listing all the topics covered in each of the video tutorials. Each of the 17 chapters (15 Main chapters and 2 bonus chapters) videos are viewable either from inside the web browser, or as independent videos which can be played in your video player of choice. The VLC media player is provided for Windows and Mac people so you do not have to download it if you do not have it on your machines. Also provided in the download files are all the blend files of the different stages of rigging of the ninja character, the python script, the version of Blender used to create the rigging and even the original concept art created by David Revoy (which looks amazing).

I found the web interface very easy to navigate and the video displayed very well in the browser and were very well encoded. If the video is too small for you in the web browser the flash player that is used has a full screen option which displays the video in full high quality.

Having explored the interface I moved on to actually watching all the videos from start to finish. This took me longer than I expected because I had to go back and watch different chapters multiple times to wrap my head around what I was being told.

Rigging is one of Blender's more advanced topics and it takes some mental gymnastics to understand some of the fundamental concepts that are involved when using Blender to do rigging. I should say that I am no rigging expert and found Mr Salvemnin's instructions easy to follow and very clear, though I did have to pay complete attention to everything he said. He takes the time to not only tell you what you need to do but also why. To me it is this combination of clear instruction and the explanation of why he does things the way he does that really makes the videos invaluable as a learning tool.

On the main cgmasters website for the rigging video they mention that the videos are appropriate for any level of Blender user. I would agree with this. I think if you have never done any rigging before you should be able to follow everything, though you will need to be paying very close attention to what is done and go back and watch the videos more than once. That said if you do take the time to properly watch and re-watch the videos you will be rewarded, no matter what your level of Blender rigging experience, even battle hardened riggers will pick up tips and tricks.

I have seen and read a lot of videos and books, and I can say that I have never seen a video tutorial that is as complete and extensive as this is on the topics of rigging. As far as I can tell (remember I am no rigging expert) it doesn't miss any information or steps required to make a professional, industrial grade, fully rigged character which you could probably use on professional productions such as Sintel. There are topics covered that I have never seen covered anywhere else (Proxy Meshes, Custom Controls, etc), which really set these videos above any other at least as far as Blender is concerned. If you manage to learn all the techniques used in these videos you will be able to do almost anything Blender rigging wise.

There are topics that are covered which by rights Mr Salvemini did not need to cover but which in being covered really helped make the video sets even better (Chaptars 14 and 15 for example).

I really can't say enough good things about these videos, they are amazing, I could not find a single thing to complain about.

If you are interested in Blender and want to get expert in rigging with Blender this is the video tutorial to get.

Review Score 100%