Showing posts with label Blender. Show all posts

24 May 2016

Chris Plush - Weapons Volume 1 – Modeling - CGMasters Video Training Course

For those that are hard core Blenderheads you will likely know about CG Masters.  They are a Blender based studio that has produced many high quality Blender training courses.  I have reviewed many of their products before and all of them have been of exceptionally high quality and worth cost and time that it takes to watch them all.

A long while back I was contacted by Chris Plush of CG Masters and asked if I would like to review his latest course.  I agreed, but unfortunately I had issues which resulted in it taking me a long time in getting around to watching the course so that I could review it.  I have now been able to get enough spare time to watch all of the course.  You won't be surprised to learn that just like all their other products this one is of the same high standard.

Product Specifications:


          This time around the course covers the modeling of a bolt action rifle with telescopic site and other relevant parts of the rifle.

          I have not reviewed many weapon modeling tutorials so it was a refreshing change for me.

          I am not a fan of guns but I know a lot of Blender modelers are so having a high quality course on the topic will be a welcome addition to the Blender educational environment.  Even if you are not a gun nut you will still find this course very useful as it shows you many ways to go about tackling how to model surfaces which have properties of hard surface modeling but also have lots of organically curved surfaces, with holes and screws scattered throughout the model of the gun.

          Along with the first volume of this course Chris will be releasing a series of free tutorials covering texturing for the rifle.

          I reviewed the downloadable version of the course which consists of almost  7 gigabytes of file data.  So you will need a reasonably fast connection to download all the files.  I had no problem, but if you have a slightly unreliable connection then I would recommend the DVD version of the course.

          Once all the files were downloaded and extracted you are left with a folder which contains all the files to follow along and watch the course.

          You can view and access all the content of the course in your web browser or you can go directly to the video and resource directories to access them using whatever software you want to use.

          The reference images that are used to model the rifle are included as is the completed model which is released under creative commons license.

          The course I would say is easy enough to follow for a Blender beginner, so seems to me to be open to all even those with almost no experience of Blender use.

          The most important part of the course are the video files.  They are very well made and encoded, very clear viewing and good sound with Chris's narration.  There are 23 video files split into 2 sections.

          The first section of videos cover the basics of setting up and using Blender and also covers some of the basic tools used throughout the course.  Section 1 will be very useful to new Blender users and will allow them to understand what is described in later parts of the course.  Of particular impressive note to me was the explanation of various modeling terminology.

          Chris uses the bevel modifier extensively through the course and he has a very good description of some of the most important options.

          There are some simple basics videos covering how fix certain issues caused by the bevel modifier.  Even an intermediate Blender user should find some of the information in those videos very useful.

          With the overview and basic tutorials out of the way Section 2 videos cover the main process of creating the parts of the gun model.

          Chris covers the preliminaries of setting up reference images in Blender.  Chris uses images assigned to planes rather than Blender background image feature.  This gives Chris a lot more flexibility, I especially liked the tip of offsetting the planes so that you can see the various reference points of the images.  As was putting the reference planes on their own layer so that they cannot be accidentally altered.

          From this point on in the course the various parts of the gun are modeled:
          • Gun Barrel
          • Gun Bolt
          • Gun Stock
          • Gun Receiver
          • Small details (screws etc.)
          • Gun Sight
          • Gun Magazine
          • Gun Butt
          • Gun Telescopic Scope
          • Scope Mounts
          While modeling the parts of the gun various tools are used and some clever techniques to accurately preserve curved surfaces with Blender's vertex projection tool is covered.

          Because a gun is a combination of curved and flat surfaces the different techniques for hard surface and curved surfaces modeling are covered completely.  Chris is very adept at modeling with both methods.  While modeling the gun occasionally there are times when Chris had to create parts of the gun with triangular faces but these places are few in number and only in places where the model is flat and so will not be affected by the triangles.  Chris does get rid of a lot of the triangles and shows various techniques to do that.

          Modeling a curved surface is often a taxing thing to do when modeling an object but Chris demonstrates some clever techniques using the Lattice Deform Modifier to create curved surfaces without having to do it manually.

          Chris can model holes both manually and using the Boolean Modifier.  Generally the Boolean Modifier is looked down upon by modelers but if you know what you are doing it can be a very effective tool for creating holes in a model.  Chris clearly demonstrates this while progressing with the modeling of the various gun parts.

          Together with an extensive use of the Edge Split Modifier is also demonstrated showing you have to control the sharpness of edges so they are not affected by the Bevel Modifier.

          Another useful tip from Chris was the use of Camera Clip Start value to enable you to zoom very close in on a model so as to prevent zooming through the mesh of the model.

          As well as the clear narration from Chris at a few points throughout the videos are various popup notes which explains certain features and changes for Blender.  These are very handy.

          One of Blender's newer features that Chris explained was CTRL+SHIFT+R feature which makes two edge loops which surround a central loop.  This is a real time saver.

          Since a lot of the time the same processes are carried out repeatedly Chris but these parts of the videos are put into time lapse mode so as not to waste time watching something you know how to do already.

          When modeling screws and bolts of the gun the Blender Bolt addon is used.  This is a very quick way of making screws and this addon is very useful.

          After all the major  parts of the gun have been modeled the final part of the course goes into final tidying up of the model.  One thing that I found very useful was the use of Matcaps to make it easier to see if a model has any shading issues caused by bad mesh geometry.  Switching on Matcap did show some issues and Chris goes over how to fix those issues.

          If you are interested in guns or if you are interested in learning how to do hard/flat surface modeling as well as curved surface modeling, you will get a lot from the course.  I know that a lot of people will be turned off by the model of the gun and would either have liked a different object to have been modeled or for the gun to be more futuristic so it was more interesting to look at.  Remember though that it is the techniques of modeling that are demonstrated that are important in this course not the actual object.

          Well worth the money, I can't wait to see the free shading tutorials as well.

          Review Score 85%

          09 May 2016

          Rob Tuytel - Creating 3D environments in Blender - Udemy Course

          Recently I have been very busy and have not been able to devote as much time to doing reviews of the various educational products available for Blender.  As a result it has been taking me longer to review some products.

          One such educational product is from a person that should be well known to all Blenderheads, Rob Tuytel owner of Blenderpedia and Blenderhead extraordinaire.

          For those who are unaware Rob Tuytel has created many different products, one that I reviewed was an ebook which went over the process of creating street scenes as if they were created in the style of the old dutch masters.  I was very impressed by the ebook.

          So when Rob contacted me many, many months ago and asked if I would review his most recent work "Creating 3D environments in Blender" I was very eager to review it but what with time constraints I knew it would take me a long while to completely watch the course.  That said I finally managed to find enough time to completely review his course.


          Product Name:  Creating 3D environments in Blender
          Author: Rob Tuytel
          Runtime: 33 Hours+
          Price: £30
          Format: Streaming Video and Resource Files

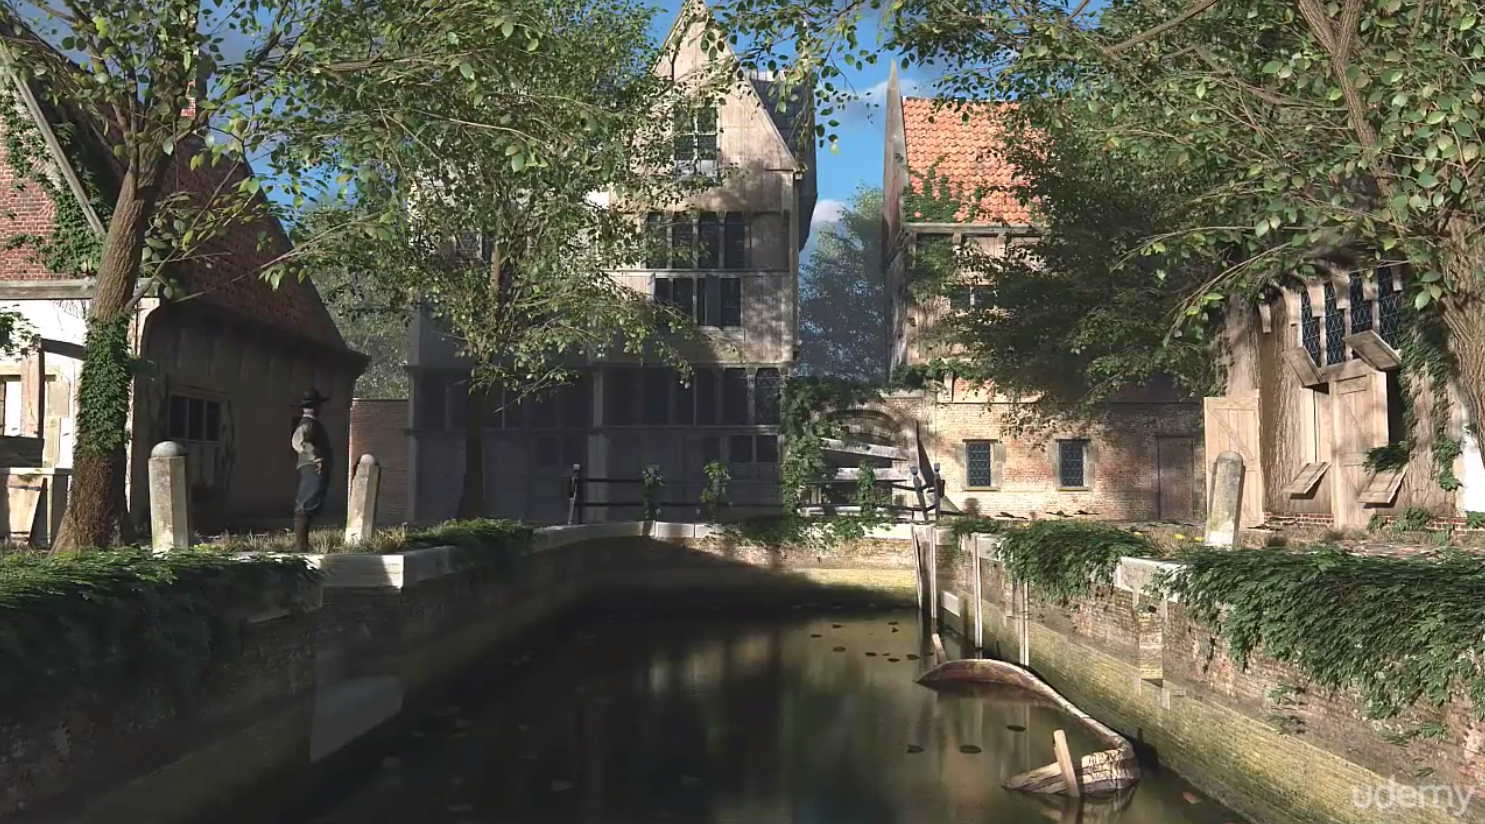
          In brief this course is a large collection of video lectures which teaches you how to create an old world street scene with buildings in the style of Dutch architecture.  These streets contain buildings, vegetation and various street furniture and various kinds of inorganic things such as rocks.

          Rob uses various different versions of Blender throughout the creation of this course but a version of Blender from 2.75 should be able to do what is needed to complete this course.

          Now it is worth making very clear that this course is huge, it is split up into 161 different video lectures ranging in running time from 5 minutes to 30 minutes and more.  The total running time of the course is more than 33 hours!  So as I am sure you can appreciate this is not a quick course to take.

          The advantage of the course being so long is that it is very detailed and goes over all aspects of creating a detailed realistic old world street scene.  Which once finished I would say looks spectacular.

          The course is delivered on the Udemy educational platform.  Udemy is educational video platform which allows teachers to create videos and add resources to those videos which the viewers that sign up for the course can download and view.

          I have to say the Udemy system for delivering educational content seems very effective I never had any problems viewing and studying using their system while watching all of Robs course.  Udemy recently upgraded their system and made it even easier to use.  The Udemy system not only allows you to view course content but interact with other users who are doing the course and even talk with the courses creator.  Which if you are learning Blender for the first time I would see as a major benefit.  Another benefit of Udemy is that you can view it on a PC/Laptop or a tablet, so however you connect to the web all your bases should be covered.  Rob also thoughtfully goes over briefly how to use the Udemy system to view his course.  So if you are new to Udemy you should have no problems.


          Once you have signed up for Rob's course what do you get:

          Roughly 161 videos,
          All the resources such as reference photo and models,
          Blend files,
          Textures
          HDRI Images
          Ebook - Old Masters Unveiled

          So literally every resource you need to follow along with the videos or create your own version of the old world street scene are provided with the course.  It's worth nothing that although you can follow along with what Rob does and create a clone of his scene he does encourage students to come up with their own ideas and concepts.

          Although the course does not skimp on the details of using Blender if you are a Blender beginner you will easily be able to follow along as Rob's explanations of Blender's various features and how to use them are very clear and well narrated.  Just as importantly the video encoding is very clear and you will be able to see everything he does in very sharp detail.

          Even if you have never used Blender before Rob has you covered he goes over the very basics of obtaining, installing and using some of Blender's most basic but fundamental features in the beginning lectures.  These were very clear and easy to understand.  They serves as the foundation for all the later videos which use similar techniques to create the assets in the scene throughout the course.

          Once using Udemy and getting and installing Blender are covered Rob introduces what will be covered in the rest of the course and enumerates the process he goes through when creating large projects such as this one.  How he brainstorms and gets ideas and inspiration, as well as how he organizes his ideas to make it easier to achieve his project goals.

          All of this is covered in Chapter 1 and 2 which goes over all the preliminaries.

          As I said previously there are 161 video lectures they are organized into chapters are follows:

          Chapter 1 - Before We Start
          Chapter 2 - Introduction To Blender And Setup
          Chapter 3 - Materials
          Chapter 4 - Creating A Simple Building
          Chapter 5 - Creating An Advanced Building
          Chapter 6 - Nature
          Chapter 7 - Road And Paths
          Chapter 8 - Light And Atmosphere
          Chapter 9 - Creating A Scene From Scratch
          Chapter 10 - Final Review - Tips & Tricks

          Chapter 2 is a great primer on the basics of Blender usage Rob covers using Blender's most useful tools for this type of project such as modifier usage and how to do basic texturing and renders of things you create.  Also covered is the basics of modeling simple shapes in Blender.

          The final part of chapter 2 takes all the information that has been taught to you up to that point and uses it to create and texture a simple but very impressive looking fence.


          It's at this point that another useful feature of the Udemy educational platform makes an appearance that of "Quiz and Quick Tests".  These are what they sound like as you progress through the course you are tested on what you have learned and rated based on your answers.  These test are only presented at the beginning stages of the course in later parts you are expected to have already learned the key concepts the course has taught up to that point.  Which you are very likely to have by that point as Rob will have drilled home those concepts many times.

          Chapter 3 goes more in-depth on creating and using Blender Cycles Material Nodes for creating realistic look node materials for the models you create while doing the course.  One thing I have noticed with very experienced and talented Blender users is that they often make very impressive results while using the least amount of features of Blender to get those results.  This is the case with Rob he create very simple but very easy and clear to understand Material Node setups which work very well for the purpose they are intended for.  Watching him create his node setups goes to show how efficient the Blender Cycles Material Nodes can be in the right hands.

          If you have never used Blender Material Node system then have no fear Rob goes over all the important features slowly and methodically so by the end of his explanations you should be clear on the way Blender Cycles Material Nodes system works.

          Once the basics of Material Nodes are covered Rob then uses the information to make a material for a leaf which is a technique used throughout the rest of the course.  More advanced topics such as Node Groups are covered.  So by the end of this chapter you will have a good grasp of how the Material Node Editor works and the power and control of materials that it gives you.


          Chapter 4 is your first really in depth test of weather you have been paying attention to what Rob has been teaching you as in this chapter he goes over all the steps to create a simple building that uses all the tools and features covered so far.  So that means modeling, altering, designing and texturing a small building which has various items on it such as windows and various building ornaments.  Don't be fooled this building is simple but in its creation you use all of the features that in later projects will be used to make more detailed and advanced buildings and other things.

          One very handy bonus feature of this chapter is coverage of how appending and linking works in Blender and how you can use it to organize and manage your scenes as they get larger and more complex.


          Chapter 5 - Creating Advanced Buildings is where things start to get very detailed and precise.  You create more advanced houses/buildings, a church and various things like borders, chimneys, roofs and windows with lot of decorations.

          With all this extra details it starts to become necessary to use various techniques to lower the poly count of the models in the scene and Rob goes over the various techniques to achieve the various Level Of Detail effects in Blender to keep the scene to manageable vertices counts within the scene.  The results are very impressive, with massive drops in vertex counts yet no loss in the quality look of the buildings.

          By the end of this chapter building and texturing various building types will be within your grasp and you should be able to take it in your stride.  This sort of modeling is called Hard Surface modeling as unsurprisingly you are modeling things which are man made and which are generally synthetic in nature.


          Chapter 6 - Nature covers the less synthetic side of scene creation that is creating organic things such as grass, moss, ivy and trees, various types of rocks and leaves.


          His coverage of each of these topics is very detailed if you want to know how to make nice looking grass you will really like this chapter.


          One thing to note is that when creating trees Rob uses a paid addon for Blender called Grove 3D.  This is a very effective tree creation addon but Grove 3D does not ship with the course, so you will either need to purchase that separately or use the other tree addon that does ship with Blender.


          Rob covers this addon briefly but for the rest of the course uses Grove 3D.  You should be able to create your own trees using the free addon that ships with Blender or create your trees manually using basic modeling techniques which Rob demonstrated previously.

          There are a lot of topics covered in this chapter but the end result looks amazing the vegetation really makes the scene come alive.

          Chapter 7 - Road And Paths covers the various techniques in creating roads and paths in a scene.  Rob also goes over his process for getting references for good path design.


          Vertex painting is used to texture and create paths that have leaves and grass which can be controlled as to where the leaves and grass appear on the roads and paths.  Also usefully a simple but useful technique for creation of puddles on the path is demonstrated which really added to the realism of the path.

          After dirt paths are covered Rob moves on to creating Cobble Stoned roads and shows a very effective method for creating them.  It is somewhat time consuming but the end result is very impressive.  Small items which help with realism and extra touches such as adding pebbles and sand to the paths are covered.


          Blender's particle system is used extensively to achieve the scattering of leaves, pebbles and grass around the scene in very quick and efficient ways.  Be aware however that you will need a fairly powerful computer to duplicate some of the techniques used, lots of ram and a fairly powerful Cuda based GPU based graphics card.  That said with a bit of forward thinking even on less powerful hardware you should be able to achieve similar results by breaking your scene up and using more appending and linking.  It will just take more organization.

          Chapter 8 - Light And Atmosphere is shorter chapter but the information contained within is no less important.  In fact the information covered on how to use and improve lighting and atmospheric effects within Blender will take your scenes from looking ok to looking spectacular with correct use of the information that Rob imparts.

          The basics aspects of lighting are covered and how Blender uses light to achieve the effects of lighting in the viewport.  Of particular note is the coverage of environment textures and lighting specifically how to use HDRI images which are massively powerful for achieving the realistic look of a scene.

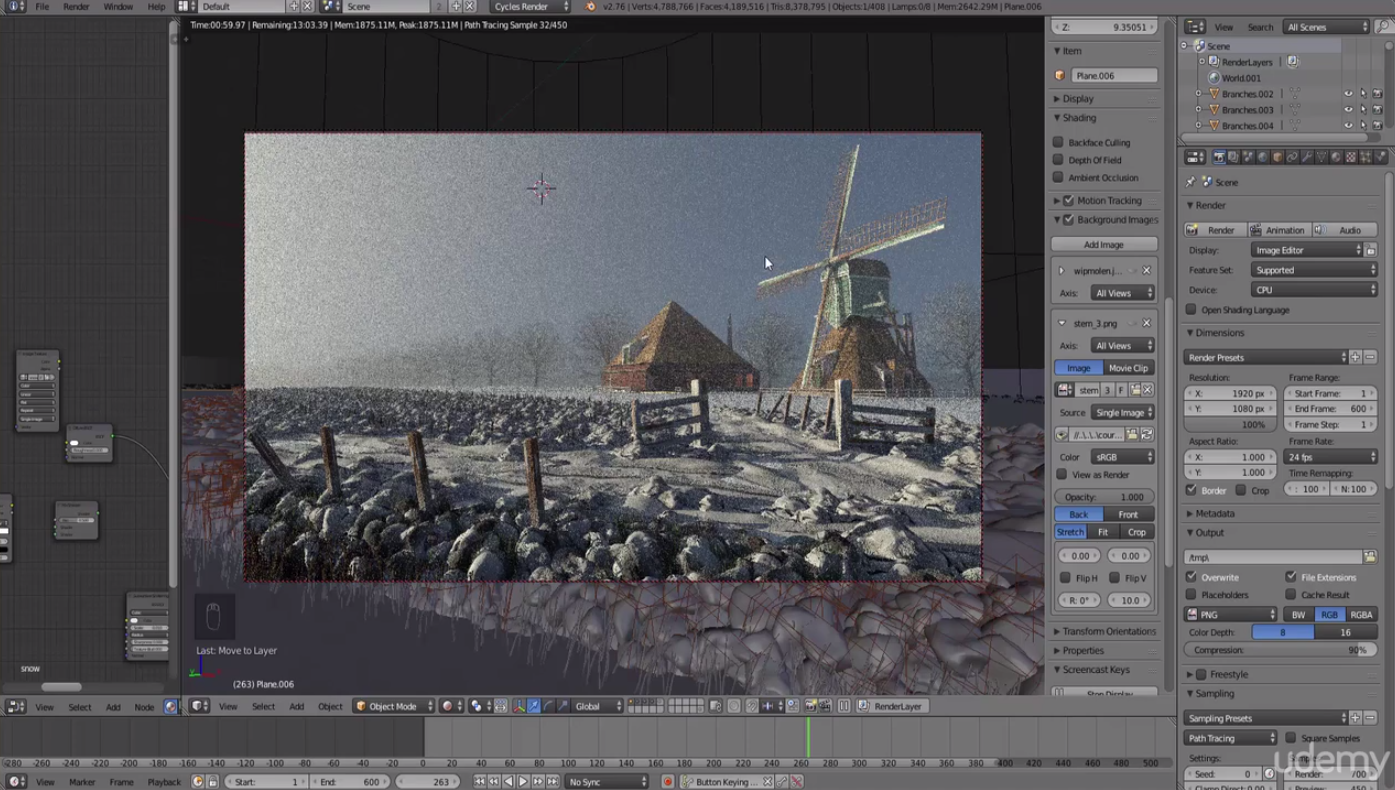
          Also covered is volumetric lighting tools in Blender to achieve atmospheric lighting effects in Blender.  Though be warned you will need a very powerful machine to use this tool or an awful lot of patience as it is a very intensive thing to calculate and use.  It is however truly amazing what a bit of atmospheric haze/fog and mist can do to a scene, so the result may well be worth the wait.

          He demonstrates this by adding an extra video with a scene full of snow showing the effects of fog within a scene.


          Chapter 9 - Creating A Scene From Scratch - This chapter takes all the previous things you learned in the previous chapters and creates an entirely new scene from the ground up.  By this point you are able to test how much you have taken in from Rob and Rob works he way through the creation of a full scene.


          It worth pointing out that Rob used a very efficient way of texturing objects in a scene called project from view, in fact I can't remember if he ever uses Blender's texture seams feature at all throughout his entire course.  He makes what would otherwise be somewhat difficult texturing tasks seem very easy with the techniques he uses.

          Rob's end resulting renders look amazing and by this point I would say that the viewer should be able to make scenes that look just as impressive.  Maybe not as quickly and efficiently as Rob but you will be able to come up with something of equivalent quality.

          Chapter 10 - Is a review of all the things you learned on the course and some extra spit and polish tips and tricks are explained to get even more effective ways to display and render your scenes to take it that extra mile.


          Now I need to point out that this review is a very quick review for a course that is so big.  If I had gone into full details of everything Rob covered throughout the entire course this review would be five times the size and would be lists and lists of features of Blender that Rob used.  It would not make for interesting reading.

          So in short Rob's course is excellent and after watching it you will be able to make some truly impressive street scenes that have both inorganic and organic features.

          The fact that this course is accessible to Blender beginners and achieves such impressive results at the same time I find very impressive.

          If you are interesting in creating and modeling street scenes with all the street furniture and organic elements you should not miss this course.

          Review Score 90%

          11 February 2016

          Gottfried Hofmann - Point Density Magical FX Pro Edition

          Blender as a 3D Creation Suit is going on its ever continuing march of adding new features and improving features that already exists within it.

          One of those improved features of Blender that recently got some attention was Point Density textures.

          Previously Point Density Textures were supported in the Blender Internal Render but not in the Cycles Render.  However recently Blender Cycles gained the support of Point Density Textures.

          For those who are not aware of what Point Density textures are the quickest way to describe them is that they are in some ways similar to Blender Smoke features but for vertices and particles.  Anywhere an object, vertices or particle appears in a Point Density Domain (3D Voxel Domain) will be rendered similar to the way smoke particles are.  Point Density support is a form of Volumetric Rendering.

          Point Density Textures allow for a myriad of Volumetic Rendering effects.  Anything where you need smoke-like, dust trails, turning objects in to glowing plasmatic forms, etc without all the intense calculation involved with real smoke simulation the Point Density Texture may be able to step in.

          Now Blenderheads are very quick to take Blenders new and improved features and put them to the test to see what they can do with them.  One of those very experienced Blenderheads Gottfried Hofmann contacted me to ask if I would review his newest product called "Point Density Magical FX".

          Since I am a big fan of Gottfried's work and I really like his BlenderDiplom Blender tutorial website, I was eager to see exactly what he could do with Point Density Textures.

          Product Specifications:

                Gottfried's newest product aims to both describe how to use and setup Point Density Textures to achieve various cool looking special effects and to provides templates which can be used in your own projects for what ever you need.  This useful as there are not really many tutorials on doing Point Density special effects type things so it fills a gap.

                You can download the product from Gottfried's website when you do you are taken to the gumroad.com website.  This website is similar to Blender Cookie in that it allows you to host and sell various types of things such as videos and tutorial.

                I have never used gumroad before but in reviewing Gottfried's work I can say that it was very easy to use.  You can download the various purchased resourced or you can watch them online, it will even let you download directly to a Drop Box account, though I was not able to test the Drop Box feature as I do not own a Drop Box account.

                To start with on getting a request email from Gottfried to review his product I got directed to his website and on purchasing the product I was directed to gumroad.com.  From there setting up an account was very straightforward.

                All purchased products are added to your gumroad.com library where you can browse and view your items as you wish.

                I tend to like to download and watch all the things I have so that's what I did.

                The Point Density Magical FX comes with various things:
                • Templates
                • Demo Files
                • Training Videos
                • PDF-Guide to Point Density in Cycles
                • Starter Files for training Videos
                • .blend of Promo Image
                • Documentation of Templates 
                There are two different versions of Point Density Magical Fx, a Pro and a Training version.  The Pro version comes will all the things mentioned above while the Training version comes with:
                • Training Videos
                • Starter .blends
                • .blend of the Promo Image
                I mainly concentrated on reviewing the Videos and PDF files as these are the most important in getting to grips with how Point Density Textures can be used.

                If you download all the files it is roughly 4gig in size.  So you will need a reasonably good internet connection speed or a lot of free time.  Though the website seems very stable and I had no problems downloading the content.

                The PDF file was the first thing I read and it gave a to the point review of what Point Density Textures are and some of the less obvious points about how they are calculated.  I found this PDF informative and useful.  If you are not one who likes to read PDFs you can get all the same information from the collection of video files that Gottfried narrates.

                It is worth noting that Gottfried's narration is very clear and easy to understand and the quality of the video encoding is very clear and well paced.  I only had basic experience of Blender Internal Point Density Textures and found it very easy to follow Gottfried's explanations of Cycles Point Density Textures.  I think that if you have never used Point Density Textures before you will also have no problems understanding and following Gottfrieds explanations.

                There are 4 videos supplied covering various Point Density Texture based special effects:
                1. Basic Point Density Setup
                2. Stylized Flame
                3. Ocean Of Spheres
                4. Smokey
                The first video shows how to setup a Point Density Texture from first principles.  Showing you the basics of how to get started with them.

                The video then moves on to making a logo illuminated by Point Density Textures.  Also covered is baking and turning Point Density Textures into images which can then be composited.  If you have never used the turbulence force field modifier this is used to achieve random movement of Point Density Textures.

                It is surprising with just some very simple settings and modifiers the quality of the effect Gottfried achieved.

                After the logo was completed the next thing that is demonstrated is using Point Density Textures to place them inside glass jars that can be effected by various light absorption and scatting effects.


                The second video covers the creations of a plasma flame like effect which can surround and object and give it a flaming look.


                Various modifiers and weight painting techniques are covered to achieve these effects, all well explained and demonstrated.

                The third video takes a different approach from the previous two in that it shows how to emulate Point Density Texture like effects without actually using Point Density Textures.  This can help with rendering speed and memory usage.


                The video shows how to take a collection of Dupli-Objects and place the Blender logo across them and have those spheres animated to morph into the Blender logo when the camera moves to the correct position.  The compositor, and the displacement modifiers and various other features of Blender are used to achieve this effect.

                In this video there were some very clever techniques and tips covered.  Of particular note was the tip that you can use the compositor viewer node to save altered images without effecting their native resolution.  Another cool little piece of information was the coverage of how to use the From Dupli tickable option to project an image texture across a collection of Dupli-Objects.  There was also so tips and tricks regarding the use of the RGB curves node.   All useful pieces of information which I did not know about.

                The forth and final video covers using Point Density Textures to create thin wispy smoke that looks similar to how tabaco smoke would look that is animated.


                One stand out point that I did not know in this video was the technique for baking particles that follow a path with the Bake Action feature with Visual Keying active to get particle trails which looks smooth.  I don't know if this is a Blender bug or a feature but, it is still very useful to know how to get around the issue.

                All in all an excellent product that is reasonably priced and very well described.

                If you are looking for how to learn Point Density Textures or just want the Blend files for making your own versions of the logos for your own products then Gottfried's latest product is for you.

                Review Score 95%

                29 November 2014

                Frederik Steinmetz & Gottfried Hofmann - The Cycles Encyclopedia (Ebook)

                Good things have been happening in the Blender world recently, specifically the Blender Cycles rendering engine has been getting all manner of improvements and new features.

                It is true that Blender Cycles is becoming the render engine of choice for Blender users when they want to do work which looks reasonably photo realistic.  The realistic lighting, shadows, caustics, reflections and global illumination almost for free out of the box, makes Blender Cycles much easier to get impressive looking renders from.

                It is certainly true that you can do very impressive work with Blender Internal render though you need a greater depth of knowledge to achieve the same level of results as you would get from Blender Cycles.

                So in short Blender Cycles has lowered the barrier to entry for impressive render results.

                So Blender Cycles seems like a slam dunk, so everyone is using it right?

                Well not quite Blender Cycles has two potential issues that you need to evaluate before taking the Blender Cycles route for rendering:

                1. Blender Cycles needs a very powerful modern GPU based graphics card.  Specially a CUDA based system from NVidia (OpenCL support from AMD is so bad at the moment it's not practical yet to use OpenCL even though that would be the better system).  And even if you have such a card, render times with Blender Cycles for certain types of scene can be very, very long.  If you don't have a compatible GPU based card you are stuck with CPU only rendering and this is a good way to gain lots of patience.
                2. Blender Cycles uses completely different methods for creating material shaders for the objects in your scene.  Specifically a Node based system.  Which unfortunately is not very well documented at the moment.  This means a lot of Blender Cycles Node functionality is a mystery to a lot of Blender users.

                Frederik Steinmetz & Gottfried Hofmann's "The Cycles Encyclopedia" ebook aims to fix the second problem in the list above.

                Product Specifications:


                      Now Blenderheads that have been around for a while will know the names Frederik Steinmetz & Gottfried Hofmann as they are two very talented Blender tutors and both BFCT's.

                      They run the www.blenderdiplom.com which produces English and German Blender tutorials of high quality regularly.

                      Frederik & Gottfried's Ebook describes all of the Blender Cycles shading nodes, and gives examples of the effects of each node.

                      Many pictures and diagrams are used to demonstrate the effects on materials of each node.  The pictures are large and in full color and very clear.  So you will not have any trouble seeing the effects of each node, as described in the book.

                      I saw a pre-release version of the Ebook (0.8) and it had some minor grammar issues and the occasional missing sections of text which had not yet been written.  By the time you read this I think version 1 will have been released and you can expect those issues to have been fixed.

                      Even with the small unwritten section and the occasional grammar errors, I think this book is currently the best available as far as documenting the Blender Cycles Shader Nodes is concerned.

                      The topics covered in this Ebook are somewhat advanced so I would say that if you are completely new to Blender or 3D in general you may struggle a little to understand some of the concepts that are explained in the text.  I think this book will be more useful to Intermediate/Advanced Blender users.

                      The price of this Ebook may seem a little high, but remember you do get 6 months of free updates to the Ebook, so it will only get better with time.

                      Excellent Ebook, if you use Blender Cycles you probably need this book.

                      Review Score 85%

                      13 July 2014

                      Aidy Burrows - Complete Environment and Animation Project

                      I was recently contacted by CG Masters to do a review of one of their newest video training products.  This time it was created by Aidy Burrows a very experienced 3D artists who has worked on many large and complex projects.

                      Aidy's latest product for CG Masters is a collection of video tutorials which goes over all the steps involved in creating a short animation of a large scale environment.

                      The total runtime of all the videos is more than 25 hours, so it is an enormous amount of content, you will need lots of time to take it all in and because it's aimed at Intermediate/Advanced level Blender users, you will most likely need to rewatch it several times for it all to sink in.

                      The animation contains 3 scenes, an inner city street scene, a dance hall, and a sewer scene.

                      Aidy goes over all of the steps required to model, sculpt, texture, composite, render and video edit each of these scenes to produce the final animation.

                      Product Specifications:


                            All of the videos are very clear and well encoded, you can access them directly or using a very clean web browser interface.  All the resources needed to follow along with the videos are provided.  The resources provided are extensive in terms of textures and Blend files.

                            The approach taken with each of the scenes when creating them is the same for each:
                            • Create Rough Block out Model of Scenes
                            • Create Higher Poly Representations
                            • Sculpt High Poly Models
                            • Texture and Bake High Poly Models onto Low Poly Models
                            • Make them renderable in Blender Cycles
                            The scenes that are created are done in such a way as to take High Poly models and reduce them down to low poly models which can be used in realtime environments such as game engines but still retain the vast majority of their high detail levels and be used to make high quality renders in Cycles.

                            So the videos will be useful to multiple target audiences:
                            • If you are interested in how to construct various architectural scenes in a structured and efficient way.
                            • If you are wanting to learn how to quickly create high quality textures using Gimp.
                            • If you need models that will be usable inside of Game Engine Environments.
                            • How to use the textures inside of Cycles and it's shader nodes
                            I can't stress enough how useful these videos will be to people who need to do high quality texturing work or realtime environment work.  The methods and techniques Aidy uses really make even very large scenes manageable on even moderate machines.

                            The introductory videos go over all the basic techniques that Aidy uses to create all scenes, props and shaders.  These techniques are then used throughout the rest of the videos.  So if you have never used the techniques that Aidy uses they are explained well and assuming you are an Intermediate/Advanced level Blenderhead you should not have any problems.

                            The videos are recorded in a mix of realtime playback speed and timelapse.  Aidy will show you in normal speed what he is doing and then when he repeats the process he will generally switch to timelapsed mode.  Even in timelapsed mode the videos are still clear and easy to follow.

                            You are effectively getting 3 products in one:
                            • Teaches how to model/sculpt.
                            • Extensive Gimp texture creation knowledge.
                            • Compositing, Rendering and Animation.
                            Any one of these products would be worth the price.

                            I learned a lot about baking of Normal Maps and texture creation using gimp and how to mix them together using Vertex Painting.

                            Normally I would give more details of the topics and techniques Aidy uses to achieve the effects in the videos, but there are so many and the range of techniques used is so large that it would be an enormous repetitive list which would basically boil down to "Aidy teaches topic X, it was well explained and clear", "Aidy teaches topic Y it was well explained and clear", and so on.  So as far as I am able to discern every topic you need to create high quality, efficient, large scale scenes is covered, all very well.

                            No Python or Blender Game Engine Logic Node use is covered as Aidy does not need these features to achieve the results he needs.

                            So it's a short review for such a large product, but the quality is excellent and I would imagine that anyone wanting to get to grips with large scale scene creation which is impressively textured and yet resource efficient will find this product very useful.  I would recommend going to the CG Masters website and checking out the example videos and check out the list of topics they cover.  All of them are done well.

                            Well worth the money.

                            Review Score 95%

                            18 June 2014

                            Lee Posey & Light BWK - BNPR's Freestyle Level Up video training

                            If you have been using Blender for any length of time then you know that Blender's feature set is forever increasing;  Hardly a week goes by when some new feature is either tweaked or an entirely new feature is added.

                            One of those reasonably new features is Blender's Freestyle feature.

                            Blender's Freestyle feature is a more feature rich and flexible version of Blender's older edge rendering technique.  Freestyle is a class of post processing non-photo realistic rendering system, used for doing stylized renders with line geometry.

                            Blender Freestyle is so flexible and powerful that not many yet know how to use it (or even what it is specifically).  There is a lot of misinformation as to what role it plays in the creative pipeline of software such as Blender and other software.

                            Light BWK & Lee Posey have a very clear definition:

                            "Freestyle is a geometry based, post processed, line art renderer. Commonly used in animation, info-graphic, arch-viz and product visualization. Freestyle is only line art, not a surface shader as most believe it is."

                            Product Specifications:
                            • Name : BNPR's - Freestyle Level Up
                            • Author : Lee Posey (TheJikz) & Light BWK
                            • Price : $38 USD or Bitcoin equivalent (on 9th June 2014)
                            • Runtime : 124 Mins
                            • Format : Video
                            • Website : https://blendernpr.org/store
                             

                                  In an attempt to remedy this apparent lack of information on what Blender Freestyle is and what it is for Lee Posey and Light BWK have created a series of video tutorials that describe the features that Freestyle has to offer, and also describes how to integrate it into your workflow.

                                  Their stated aim is:

                                  "Learn FreeStyle the fun way. Masterfully create geometry based post-processed *line art* from the very basic to the very advanced for your still images, product design, arch-viz, motion graphics and motion pictures."

                                  Both Lee Posey and Light BWK are very experienced Blender users so you can expect the information they provides to be accurate.

                                  The tutorial series comes with all the videos and Blend files included.  The videos are very clear and well encoded and they are spoken very clearly and very well produced.

                                  For each purchase of this course a percentage of the money raised goes towards funding development of B.E.E.R (Blender Extended Expressive Rendering) an impressive Non-Photo Realistic rendering extension for Blender.

                                  You can see the videos for the site promotion and Freestyle line demo for the Freestyle Level Up course below:


                                  There are 15 videos which teach the various important topics for getting to grips with Freestyle.

                                  The approach taken when teaching the material is to use a points scoring game metaphor.  With short videos which teach specific topics in a short amount of time as you watch the material and do the tasks you gain points.  This game based approach is somewhat strange but the information provided is accurate and clear and you can ignore the point scoring if you want to.

                                  It should be made clear that if you are entirely new to Blender you may struggle with this material;  As it is assumed you have at least basic familiarity with Blender's interface and how to interact with it.  If you do have this level of knowledge of Blender then you should be able to understand what is presented in this course.  The fast pacing of the videos does mean though that you may well have to watch some videos multiple times to grasp the topics that are covered.

                                  Freestyle is not anymore difficult than other parts of Blender but it does have strange terminology which can take a while to wrap your head around, but the terminology is consistent to other software according to the authors.

                                  The tutorial videos often speak of things like mastering a topic, and while you will get a lot of useful information from the videos, Freestyle has so many options and they are so configurable that you will at best get a good grounding in what Freestyle is capable of;  It will require extensive experimentation to get the most out of this material.

                                  The Freestyle Python API method of controlling Freestyle is not covered, but this is not really a major limitation as this still leaves a lot to learn from and experiment with.  According to the authors the Freestyle API is undergoing lots of changes and could not yet be documented in a tutorial series.

                                  Features such as Line Sets, Styles, and Line Textures, Line Modifiers are covered and various examples are used to demonstrate some of the harder to grasp features.  You are expected to experiment and try out various features for yourself when watching the videos.

                                  All in all an excellent introduction to Blender Freestyle, and currently the only good source of Blender Freestyle information, as the Wiki information is not the easiest things to understand at the moment.  There are various websites but the information they cover is patchy and does not cover Freestyle as a single whole.

                                  Well worth adding to your collection of Blender based learning materials.

                                  Review Score 85%

                                  22 December 2013

                                  Rob Tuytel - Creating 3D Environments - Unveiling The Old Masters

                                  Rob Tuytel contacted me recently asking me to review one of his newest books "Creating 3D Environments - Unveiling The Old Masters".  I was excited to review this book as Rob is a very talented Blender user.

                                  So talented that he worked on the Blender Foundation Open Movie "Tears Of Steel".  If you watched that movie then you will likely have seen the very distinctive buildings.

                                  This ebook covers creating 3D environments using Blender tools.  The novel thing about Rob's approach is that he tries to model and texture buildings in a style similar to the old Dutch Masters.

                                  Product Specifications:
                                   

                                        The Ebook is full color, all the images in the book are very clear and easy to see.

                                        This book is not for Blender beginners, it is aimed at Blender users who know how to use Blender tools, specifically, modifiers, uv texturing, cycles node system for example.

                                        If you have been using Blender for a reasonable amount of time you should be able to gain much from the information in this book, especially if you are interested in creating environment scenes with the old masters compositional styles.

                                        There are 2 version of the ebook available, one version comes with just the ebook that I am reviewing in this post, the other version comes with this ebook and an extra character pack.  This second version costs more but the character pack could be very useful for people who want to make environmental scenes with Blender but aren't very good at creating their own character models.

                                        It was mentioned previously that this book is aimed at intermediate level Blender users and the main reason for this is that when Rob explains what he does to achieve his modeling and texturing effects in Blender, he tells you what he doesn't but he doesn't tell you how to do it, you are expected to know.  This has a big advantage that he can cover a lot of ground going over the different aspects of environment creation.

                                        This books is aimed at Blender users but if you are coming from other software you should be able to convert the information easily enough.

                                        The book starts with Rob explaining some of his background and the history of the subject he is about to create, he covers some of his favorite painters and what he is inspired by.

                                        After the discussion on art history the real work starts, he breaks down paintings of old street scenes explaining why they are composed the way they are and how you as a Blender user can use the same techniques to achieve the high quality results in your own work.

                                        The book then moves on to creating a scene from a painting in Blender.  Although you can try to exactly follow along and make the same sort of picture as Rob uses in his examples, he recommends throughout the book that you instead find your own scene to recreate instead of try to exactly copy him.  He would rather you use his techniques to make your own scene as he says you will learn more;  This on the whole seems to me to make sense and will make reading the book much more fun.

                                        The street scene he creates is created in stages as he progresses through the book.

                                        These are just some of street scene elements he covers:
                                        • Street Foundations (Roads, Bridges, Pavements)
                                        • Making cobbled roads
                                        • Bridge and Railings
                                        • Buildings (Walls, Windows and Doors, Roof)
                                        • Adding Grime and aging a scene
                                        • Vegatation (Trees and Bushes, Grass, Moss)
                                        • Prop Items (smaller Items that appear in a scene)
                                         At a couple of places in the book he uses another piece of software called "Flora 3D" to do trees and bushes.  This is not open source or cross platform and isn't cheap.  Though Rob also shows ways to make similar objects using Blender's sapling addon.

                                        Throughout this section of the book when he is creating models and texturing them he uses the same set of tools over and over again to achieve very impressive results in his renders.  It goes to show that you don't need to use Blender's more complex tools to get excellent results.

                                        Having created and textured all the items in his scene he moves on to the  topic of atmosphere and lighting of the scene.  He covers some of Blender's lighting settings and how changing them can alter the look and feel of your final render.

                                        Finally that last part of the book goes over the process he goes through when making his own custom 3D environment scenes.  This covers collecting textures, planning how long the scene will take to make, visiting locations for inspiration, rough blocking of scene, modeling, texturing and finally rendering.

                                        Also especially useful are that throughout the book Rob has links to various videos he has created that show specific topics in greater detail for those who are interested.  They are very good videos and well worth a viewing.

                                        One interesting point he made was that he likes to finish a scene and then leave it for a while and come back to it so that he can look at it with fresh eye and make any improvements then.  This is a really good idea, don't think I have seen it expressed before in a Blender book.

                                        One thing to note is that although this book is written in English it is not Rob's native tongue so very occasionally the book can use odd wording, this is not a big issue but something to be aware of.

                                         So for the most part this is a very interesting and useful book, but do not expect it to hold your hand and explain every little thing to you, you are expected to know your way around Blender.

                                        Review Score 80%

                                        30 November 2013

                                        CG Masters - Master It - Volumes 1 & 2 - DVD Training Review

                                        CG Masters have released another one of their tutorial series this time called "Master It"; 

                                        It's a two volume Blender video training course which is aimed at beginning Blender users.  With it's aim being to take those beginners and give them broad exposure to many of Blenders different tools and features, enabling them to get up and running quickly when using Blender.

                                        This course is presented by Christopher Plush and Aidy Burrows.  Both Christopher and Aidy are very talented Blender users with a lot of Blender knowledge to impart.

                                        Product Specifications:
                                         

                                              If you decide to purchase this training course then you have two options, you can either buy a physical DVD or you can download an electronic version.  In either case the price of the course is the same and both version present the same material.

                                              The price is one of the first things I noticed.  For $60 dollars you get almost 18 hours of training material.  So the value for money aspect is very high given the quality of the training material.

                                              As with all CG Masters tutorial materials the content is produced to an extremely high quality;  The video and audio are very clear and easy to follow.  With lots of realtime and occasionally timelapsed video recording.  Chris and Aidy are very good an explaing what they are doing throughout their videos.

                                              The materials provided in the course include all the Blend files, videos, textures and final results of all the work for you to examine. You can access the videos and other resources either directly using your own media player of choice, or alternatively access all the content from inside your web browser.

                                              The web browser interface neatly organizes all the course content into manageable sizes allowing you to quickly navigate to the sections that interest you most.

                                              This is a course for beginning Blender users so it is designed to be watched from start to finish and where possible you are advised to follow along and try and carryout the tasks shown in the training videos.

                                              Unlike a lot of beginner type courses this one tries to cover all of the most fundamental features of Blender and it's tools.  By necessity it can't cover every single feature but it does cover a lot of different topics, and most of the important tools and features are covered.

                                              Topics List:

                                              Volume 1 - Section 1 - Welcome To Class 
                                              • Chapter 1 - How To View
                                              • Chapter 2 - Common Terminology

                                              Volume 1 - Section 2 - Understanding Blender
                                              • Chapter 1 - 3D Space
                                              • Chapter 2 - Anatomy Of A Mesh
                                              • Chapter 3 - Saving And Loading
                                              • Chapter 4 - Window Types
                                              • Chapter 5 - Creating A New Layout
                                              • Chapter 6 - Toolbars
                                              • Chapter 7 - Layers
                                              • Chapter 8 - User Preferences

                                              Volume 1 - Section 3 - Working with Blender
                                              • Chapter 1 - Object Mode
                                              • Chapter 2 - Part 1 - Edit Mode & Modeling
                                              • Chapter 2 - Part 2 - Creating A Toon House
                                              • Chapter 3 - The 3D Cursor And Object Origins
                                              • Chapter 4 - The Specials Menu
                                              • Chapter 5 - Materials And Textures
                                              • Chapter 6 - UV Unwrapping
                                              • Chapter 7 - Color, Normal, and Specular Maps

                                              Volume 1 - Section 4 - Lighting and Rendering
                                              • Chapter 1 - Blender Internal VS Cycles Renderer
                                              • Chapter 2 - Camera
                                              • Chapter 3 - Lighting
                                              • Chapter 4 - Lighting And Rendering A Scene

                                              Volume 1 - Section 5 - Modifiers
                                              • Chapter 1 - Introduction to Modifiers
                                              • Chapter 2 - Generate Modifiers
                                              • Chapter 3 - Deform Modifiers

                                              Volume 1 - Section 6 - Animation and Physics
                                              • Chapter 1 - Introduction to Animation
                                              • Chapter 2 - Object Animation
                                              • Chapter 3 - Cannon Blast Exercise

                                              Volume 1 - Section 7 - Game Engine
                                              • Chapter 1 - Introduction
                                              • Chapter 2 - Adding The Main Controls
                                              • Chapter 3 - The Keys
                                              • Chapter 4 - Opening The Door
                                              • Chapter 5 - The Final Product

                                              Volume 1 - Section 8 - Tips And Tricks
                                              • Chapter 1 - Tips And Tricks
                                              • Chapter 2 - Creating Normal And Specular Maps
                                              • Chapter 3 - Normal Maps, Bump Maps, Displacement Maps, Which One Do I Use?

                                              Volume 2 - Section 1 - Acoustic Guitar In Cycles
                                              • Chapter 1 - Setting Up The Blueprints
                                              • Chapter 2 - Modeling The Body
                                              • Chapter 3 - Neck And Headstock
                                              • Chapter 4 - Fretboard
                                              • Chapter 5 - Turning Pegs
                                              • Chapter 6 - Strings
                                              • Chapter 7 - UV Mapping
                                              • Chapter 8 - Creating The Texture Maps
                                              • Chapter 9 - The Environment
                                              • Chapter 10 - Rendering In Cycles

                                              Volume 2 - Section 2 - Game Scene Overview
                                              • Chapter 1 - Baking AO And Shadow Maps
                                              • Chapter 2 - Game Scene Overview

                                              Volume 2 - Section 3 - Finishing The Toon House
                                              • Chapter 1 - Addons - Grass, Ivy, Clouds
                                              • Chapter 2 - Nodes
                                              • Chapter 3 - Finished Toon House Overview

                                              Volume 2 - Section 4 - Cool Extras
                                              • Chapter 1 - More Addons
                                              • Chapter 2 - Cloth Simulation
                                              • Chapter 3 - Face Modeling Made Easy
                                              • Chapter 4 - Making Tileable Textures

                                              As you can see from the topics list above the range of topics covered is very extensive.

                                              Videos range in length from just a few minutes to over an hour.

                                              The course is split between two volumes. The first covers the very basics, while the second volume covers slightly more advanced topics.

                                              The standout part for me in volume one was the creation of a cartoon style house.  Using a select few tools Chris was able to create a very fun looking house.  This house is later improved on in volume two.

                                              The second volume can be thought of as using all the topics and tools covered in the first volume to product bigger more complex projects.  For example volume two goes over how to model and texture a guitar, using all the tools mentioned in the previous first volume.  Volume two also covers various extra features and tools that Blender provides, such as addons and simulation features.

                                              I personally would have prefered more and deeper coverage of the Blender Game Engine and a little more focus on the Shading Nodes of Blender Cycles Render.  Although both Blender Internal features and Blender Cycles render features are covered, a little more coverage of the Cycles nodes would have been welcome.  That said for a beginner course there is more than enough coverage to keep you busy learning and digesting what is in this course for a long time.  Also note that the Blender Game Engine coverage does not cover Python Scripting.  The Video Sequence Editor is not covered but is planned for a future course.

                                              So all in all these two volumes are excellent and will get a beginner up to speed and confident in using Blender very quickly.  Even if you are not a complete beginner you will likely learn something from the second volume with its more advanced coverage.

                                              So two volumes of training videos at this price, with this level of quality, it's a good choice;  If you are wanting to get a handle on Blender they are well worth having.

                                              Review Score 90%

                                              02 October 2013

                                              Joe Larson - 3D Printing Blueprints - Ebook review

                                              Packt Publishing recently came out with an ebook "3D Printing Blueprints".  3D printing is something that I am very interested in and since Blender is very good at allowing 3D printing I was instantly interested in reading this book, especially since it covers using Blender to create the models that get 3D printed.  So it was handy because Packt contacted me asking if I would review it, which I was, so I did.

                                              Product Specifications:
                                               

                                                    First for those who don't know 3D printing is the process of creating real world physical models using special devices called 3D printers.  Instead of printing words on a page they can use various types of materials to print objects in 3 dimensions.

                                                    Until very recently 3D printers were only available to the professional 3D rapid prototyping business community.  They are very advanced and can print almost anything but with that flexibility comes cost and as a result they were very expensive to both buy and maintain.

                                                    Recently however 3D printers have become much cheaper to buy and maintain;  So cheap in fact that now there are a multitude of low cost 3D printers which are ideally suited to home use.  These home use level 3D printers are not as advanced as those in the professional environment but they are improving quickly.  It probably won't be long before increased demand from the home consumer market starts to be the main driver of the features and flexibility that 3D printers have.

                                                    With a 3D printer and some 3D modeling software to design the things you want to 3D print you can become your own object creator.  The range of objects you can design is almost unlimited.

                                                    This book covers using the Makerbot line of 3D printers to print objects and uses Blender to model those objects.  If you own a different make of 3D printer do not worry all the information in this book can be used with other 3D printer types, with very few changes.

                                                    The images in the Ebook are in full color and for the most part easy to interpret.  The writing style is a little patchy in places there are some typo's and the odd hard to understand section of instructions.  I was however able to do all of the tasks in the book.  It's a very quick paced book it quickly goes from one project to the next building on the previous projects.

                                                    The book takes a graded approach, covering the very basics of using Blender and how to model 3D objects to give them the best possible chance of giving you a successful 3D printed object.

                                                    Each 3D printed object that you model in Blender and then prepare for printing is called a Blueprint.  These Blueprint go from very simple to moderately involved.  If you are a beginning Blender user and have never used a 3D printer before than this book will be useful to you.

                                                    Please be aware though that the coverage of Blender features is very basic if you want an in depth guide to all of Blender's modeling features this is not the book for you.  What it will do is cover the basic features of Blender and show you how to use those features to create simple 3D printed models.

                                                    The 3D printed models that are created in this book are:

                                                    A Small Mug
                                                    A Vase
                                                    An SD Card Holder
                                                    A Toy Robot
                                                    A Number Choose
                                                    A Teddy Bear Figurine

                                                    Joe Larson the author of this book I had not heard of before and that is always a worry but on reading his bio I was less worried as he has had a varied career path, all very interesting.

                                                    So if you want a simple book that covers the basics of using Blender to make simple models which can then be successfully 3D print this is a good book.  Just don't expect and in depth treatment for using Blender or your 3D printer.  This book is a face paced quick read to get you up and running as fast as possible into the world of 3D printing.

                                                    Review Score 75%

                                                    12 June 2013

                                                    Tony Mullen's - Mastering Blender 2nd Edition - Ebook review

                                                    With the constant publication of Blender books and video training materials that are available to review, it can sometime become difficult to keep track of them all.

                                                    I managed to miss reviewing one of Tony Mullen's recent Blender related publications:
                                                    For those unaware Tony Mullen is a very experienced Blender user who writes books about topics related to Blender quicker than most people can read them;  The end result of all this writing is that he has amassed large collection of books covering many aspects of Blender.

                                                    The list of previous Tony Mullen books that are Blender related:
                                                    The content of his previous books have all been very high quality.  As Blender gets updated and new features get added Tony will come out with updated books covering the new features.  This is the case with "Mastering Blender 2nd Edition";  It is an update to the "Mastering Blender" book.

                                                    This update was released in December 2012, so this review is roughly 7 or 8 months late.  Luckily although Blender has had lots of new features and changes in the intervening months, the information in the book is for the most part still relevant and accurate.  There are small inconsistency but since this book is aimed at the intermediate Blender user this should not be a problem;  The book covers the 2.6x series of Blender.

                                                    Product Specifications:
                                                    • Name : Mastering Blender 2nd Edition
                                                    • Author : Tony Mullen
                                                    • Price : €48 (on 12th June 2013)
                                                    • Pages (Useful) : 630
                                                    • Format : Ebook (DRM Adobe Editions)


                                                    Mastering Blender 2nd Edition is a big book, it has to be because it tries to cover most of the major features that Blender has, giving an intermediate level Blender user a good grounding in the use of Blender.  I think this book will be a little hard to follow for a complete Blender beginner so the intermediate tag is appropriate.

                                                    The ebook version of this book that I read has full color pictures and they are very clear and numerous.  If you buy the printed book version the pictures are mostly in grayscale but there is a color inset in the book for the pictures which need to be in color to properly interpret them.  All the resources and files used throughout the book are provided on the website.  They downloaded quickly and reliably for me.

                                                    The book is split into 5 parts over 16 chapters:

                                                    Part I Fundamentals of Blender 3D
                                                    • Chapter 1 Working in Blender
                                                      Data and Data Access
                                                      Improving Your Workflow

                                                    • Chapter 2 Working with Textures and Materials
                                                      Creating UV Textures with Blender and GIMP
                                                      Advanced Materials with Material Nodes
                                                      Transparency and Subsurface Scattering
                                                      Creating Convincing Real-Time Viewport Materials with Material Capture Images

                                                    • Chapter 3 Sculpting and Retopo Workflow
                                                      Sculpting with Blender
                                                      Retopologizing the Mesh
                                                      Normal Map Baking
                                                    • Chapter 4 Rendering and Render Engines
                                                      What Is Rendering?
                                                      Rendering with Cycles
                                                      Rendering with Renderfarm.fi
                                                    Part II Physics and Simulations
                                                    • Chapter 5 Getting Flexible with Soft Bodies and Cloth
                                                      The Hard Facts on Soft Bodies
                                                      Force Fields and Collision
                                                    • Chapter 6 Working with Particles
                                                      Introducing Emitter Particles
                                                      Working with Boids
                                                      Hair Particles
                                                    • Chapter 7 Volumetric Fluid, Smoke, and Fire
                                                      Using the Blender Fluid Simulator
                                                      Getting the Shot
                                                      Simulating Smoke and Fire

                                                    • Chapter 8 Bullet Physics and the Blender Game Engine
                                                      Physics in the BGE
                                                      Rigid Body Simulation and F-Curves
                                                      Joints, Ragdolls, and Robots
                                                      Further Resources
                                                    Part III Video Post-production in Blender
                                                    • Chapter 9 Compositing with Nodes
                                                      Compositing with Render Layers and Passes
                                                      Pulling a Green Screen Matte with Nodes
                                                      Using the AnimAll Add-on
                                                    • Chapter 10 Advanced 3D/Video Compositing
                                                      Camera Tracking and the Movie Clip Editor
                                                      Setting Up the Scene in 3D
                                                      Masking in the Clip Editor
                                                    • Chapter 11 Working with the Video Sequence Editor
                                                      Introducing the Video Sequence Editor
                                                      Adding Transitions and Compositing in the VSE
                                                      Working with Blender Scenes in the VSE
                                                    Part IV Blender-Python
                                                    • Chapter 12 The Blender-Python Interpreter
                                                      Introducing Python
                                                      Understanding the Python Development Environment
                                                      Understanding Python Syntax
                                                    • Chapter 13 Python Scripting for Blender
                                                      Editing and Running Scripts in Blender
                                                      Creating an Interactive Add-on
                                                      Working with Custom Properties
                                                    Part V Mastering the Blender Game Engine
                                                    • Chapter 14 Creating Assets for the Blender Game Engine
                                                      Creating Content for the Game Engine
                                                      Setting Up the World
                                                      Getting More Familiar with the BGE Environment
                                                    • Chapter 15 Making Things Happen in the Game Engine
                                                      Working with Logic Bricks
                                                      Using Properties, Messages, and States
                                                      Creating Special Effects with Textures
                                                      Working with Sound in the BGE
                                                    • Chapter 16 Python Power in the Blender Game Engine
                                                      From Logic Bricks to Python
                                                      Python Power for the BGE
                                                      Sound Effects and Multiple Viewports
                                                      Further Resources

                                                      As can be seen from the table of contents list above the range of topics covered is extensive.  All of the chapters are well written and very clear.

                                                      The teaching approach taken in each of the chapters is to explain a particular topic in enough detail for you to follow along and then links are given for you to find even more information if you want to get even more in depth.

                                                      One very nice feature was that at the end of each chapter there are a set of challenges that the book asks you to complete;  These challenges serve to cement your knowledge of the topics just discussed in that chapter.  I found this approach very useful and I think it's a method that serves well in really getting you to understand certain topics.  If you just want to read without doing the challenges you can, the book does not require that you do them to be useful.

                                                      Each of the chapters of the book has information in them that Blender users will find useful and informative.  Standout parts for me were the coverage of materials and textures, Python and Blender Game Engine use.  I liked the  texturing section as it covered methods of creating seamless textures that I had not seen before;  The Python and Blender Game Engine coverage I liked because it's always good when less covered features of Blender are detailed.

                                                      Other topics such as sculpting, baking, retopology and sub-surface scattering are also covered in extensive detail.

                                                      Both the theory side and practical sides of the subjects are covered so if you are completely new to a topic Tony describes what it is and why it is useful.

                                                      Another section that got my interest was the coverage of Blender's Camera Tracking and Movie Clip editor.  I think this is the first time I have seen this feature covered in a book.  It was covered well and will be useful to those who want to get into Camera Tracking.

                                                      There is one major downside to this ebook and that is the DRM (Adobe Digital Editions) that is applied to the ebook.  It is so troublesome that I actually had to find a hacked unencrypted version just to read it on my Linux machine.  So if you are against DRM or not on Windows I would suggest not going for the ebook version and instead buy the paper book instead.  Wiley/Sybex really need to do something about this appalling DRM (just as other publishers have), it harms Tony's book.

                                                      So even though I am late in reviewing this book its content is excellent (even though it is wrapped in DRM stupidity) and still accurate enough to be relevant.  If you are wanting to brush up on you Blender knowledge this book will do the job very well.

                                                      Review Score 85%