24 May 2016

Chris Plush - Weapons Volume 1 – Modeling - CGMasters Video Training Course

For those that are hard core Blenderheads you will likely know about CG Masters.  They are a Blender based studio that has produced many high quality Blender training courses.  I have reviewed many of their products before and all of them have been of exceptionally high quality and worth cost and time that it takes to watch them all.

A long while back I was contacted by Chris Plush of CG Masters and asked if I would like to review his latest course.  I agreed, but unfortunately I had issues which resulted in it taking me a long time in getting around to watching the course so that I could review it.  I have now been able to get enough spare time to watch all of the course.  You won't be surprised to learn that just like all their other products this one is of the same high standard.

Product Specifications:


          This time around the course covers the modeling of a bolt action rifle with telescopic site and other relevant parts of the rifle.

          I have not reviewed many weapon modeling tutorials so it was a refreshing change for me.

          I am not a fan of guns but I know a lot of Blender modelers are so having a high quality course on the topic will be a welcome addition to the Blender educational environment.  Even if you are not a gun nut you will still find this course very useful as it shows you many ways to go about tackling how to model surfaces which have properties of hard surface modeling but also have lots of organically curved surfaces, with holes and screws scattered throughout the model of the gun.

          Along with the first volume of this course Chris will be releasing a series of free tutorials covering texturing for the rifle.

          I reviewed the downloadable version of the course which consists of almost  7 gigabytes of file data.  So you will need a reasonably fast connection to download all the files.  I had no problem, but if you have a slightly unreliable connection then I would recommend the DVD version of the course.

          Once all the files were downloaded and extracted you are left with a folder which contains all the files to follow along and watch the course.

          You can view and access all the content of the course in your web browser or you can go directly to the video and resource directories to access them using whatever software you want to use.

          The reference images that are used to model the rifle are included as is the completed model which is released under creative commons license.

          The course I would say is easy enough to follow for a Blender beginner, so seems to me to be open to all even those with almost no experience of Blender use.

          The most important part of the course are the video files.  They are very well made and encoded, very clear viewing and good sound with Chris's narration.  There are 23 video files split into 2 sections.

          The first section of videos cover the basics of setting up and using Blender and also covers some of the basic tools used throughout the course.  Section 1 will be very useful to new Blender users and will allow them to understand what is described in later parts of the course.  Of particular impressive note to me was the explanation of various modeling terminology.

          Chris uses the bevel modifier extensively through the course and he has a very good description of some of the most important options.

          There are some simple basics videos covering how fix certain issues caused by the bevel modifier.  Even an intermediate Blender user should find some of the information in those videos very useful.

          With the overview and basic tutorials out of the way Section 2 videos cover the main process of creating the parts of the gun model.

          Chris covers the preliminaries of setting up reference images in Blender.  Chris uses images assigned to planes rather than Blender background image feature.  This gives Chris a lot more flexibility, I especially liked the tip of offsetting the planes so that you can see the various reference points of the images.  As was putting the reference planes on their own layer so that they cannot be accidentally altered.

          From this point on in the course the various parts of the gun are modeled:
          • Gun Barrel
          • Gun Bolt
          • Gun Stock
          • Gun Receiver
          • Small details (screws etc.)
          • Gun Sight
          • Gun Magazine
          • Gun Butt
          • Gun Telescopic Scope
          • Scope Mounts
          While modeling the parts of the gun various tools are used and some clever techniques to accurately preserve curved surfaces with Blender's vertex projection tool is covered.

          Because a gun is a combination of curved and flat surfaces the different techniques for hard surface and curved surfaces modeling are covered completely.  Chris is very adept at modeling with both methods.  While modeling the gun occasionally there are times when Chris had to create parts of the gun with triangular faces but these places are few in number and only in places where the model is flat and so will not be affected by the triangles.  Chris does get rid of a lot of the triangles and shows various techniques to do that.

          Modeling a curved surface is often a taxing thing to do when modeling an object but Chris demonstrates some clever techniques using the Lattice Deform Modifier to create curved surfaces without having to do it manually.

          Chris can model holes both manually and using the Boolean Modifier.  Generally the Boolean Modifier is looked down upon by modelers but if you know what you are doing it can be a very effective tool for creating holes in a model.  Chris clearly demonstrates this while progressing with the modeling of the various gun parts.

          Together with an extensive use of the Edge Split Modifier is also demonstrated showing you have to control the sharpness of edges so they are not affected by the Bevel Modifier.

          Another useful tip from Chris was the use of Camera Clip Start value to enable you to zoom very close in on a model so as to prevent zooming through the mesh of the model.

          As well as the clear narration from Chris at a few points throughout the videos are various popup notes which explains certain features and changes for Blender.  These are very handy.

          One of Blender's newer features that Chris explained was CTRL+SHIFT+R feature which makes two edge loops which surround a central loop.  This is a real time saver.

          Since a lot of the time the same processes are carried out repeatedly Chris but these parts of the videos are put into time lapse mode so as not to waste time watching something you know how to do already.

          When modeling screws and bolts of the gun the Blender Bolt addon is used.  This is a very quick way of making screws and this addon is very useful.

          After all the major  parts of the gun have been modeled the final part of the course goes into final tidying up of the model.  One thing that I found very useful was the use of Matcaps to make it easier to see if a model has any shading issues caused by bad mesh geometry.  Switching on Matcap did show some issues and Chris goes over how to fix those issues.

          If you are interested in guns or if you are interested in learning how to do hard/flat surface modeling as well as curved surface modeling, you will get a lot from the course.  I know that a lot of people will be turned off by the model of the gun and would either have liked a different object to have been modeled or for the gun to be more futuristic so it was more interesting to look at.  Remember though that it is the techniques of modeling that are demonstrated that are important in this course not the actual object.

          Well worth the money, I can't wait to see the free shading tutorials as well.

          Review Score 85%

          09 May 2016

          Rob Tuytel - Creating 3D environments in Blender - Udemy Course

          Recently I have been very busy and have not been able to devote as much time to doing reviews of the various educational products available for Blender.  As a result it has been taking me longer to review some products.

          One such educational product is from a person that should be well known to all Blenderheads, Rob Tuytel owner of Blenderpedia and Blenderhead extraordinaire.

          For those who are unaware Rob Tuytel has created many different products, one that I reviewed was an ebook which went over the process of creating street scenes as if they were created in the style of the old dutch masters.  I was very impressed by the ebook.

          So when Rob contacted me many, many months ago and asked if I would review his most recent work "Creating 3D environments in Blender" I was very eager to review it but what with time constraints I knew it would take me a long while to completely watch the course.  That said I finally managed to find enough time to completely review his course.


          Product Name:  Creating 3D environments in Blender
          Author: Rob Tuytel
          Runtime: 33 Hours+
          Price: £30
          Format: Streaming Video and Resource Files

          In brief this course is a large collection of video lectures which teaches you how to create an old world street scene with buildings in the style of Dutch architecture.  These streets contain buildings, vegetation and various street furniture and various kinds of inorganic things such as rocks.

          Rob uses various different versions of Blender throughout the creation of this course but a version of Blender from 2.75 should be able to do what is needed to complete this course.

          Now it is worth making very clear that this course is huge, it is split up into 161 different video lectures ranging in running time from 5 minutes to 30 minutes and more.  The total running time of the course is more than 33 hours!  So as I am sure you can appreciate this is not a quick course to take.

          The advantage of the course being so long is that it is very detailed and goes over all aspects of creating a detailed realistic old world street scene.  Which once finished I would say looks spectacular.

          The course is delivered on the Udemy educational platform.  Udemy is educational video platform which allows teachers to create videos and add resources to those videos which the viewers that sign up for the course can download and view.

          I have to say the Udemy system for delivering educational content seems very effective I never had any problems viewing and studying using their system while watching all of Robs course.  Udemy recently upgraded their system and made it even easier to use.  The Udemy system not only allows you to view course content but interact with other users who are doing the course and even talk with the courses creator.  Which if you are learning Blender for the first time I would see as a major benefit.  Another benefit of Udemy is that you can view it on a PC/Laptop or a tablet, so however you connect to the web all your bases should be covered.  Rob also thoughtfully goes over briefly how to use the Udemy system to view his course.  So if you are new to Udemy you should have no problems.


          Once you have signed up for Rob's course what do you get:

          Roughly 161 videos,
          All the resources such as reference photo and models,
          Blend files,
          Textures
          HDRI Images
          Ebook - Old Masters Unveiled

          So literally every resource you need to follow along with the videos or create your own version of the old world street scene are provided with the course.  It's worth nothing that although you can follow along with what Rob does and create a clone of his scene he does encourage students to come up with their own ideas and concepts.

          Although the course does not skimp on the details of using Blender if you are a Blender beginner you will easily be able to follow along as Rob's explanations of Blender's various features and how to use them are very clear and well narrated.  Just as importantly the video encoding is very clear and you will be able to see everything he does in very sharp detail.

          Even if you have never used Blender before Rob has you covered he goes over the very basics of obtaining, installing and using some of Blender's most basic but fundamental features in the beginning lectures.  These were very clear and easy to understand.  They serves as the foundation for all the later videos which use similar techniques to create the assets in the scene throughout the course.

          Once using Udemy and getting and installing Blender are covered Rob introduces what will be covered in the rest of the course and enumerates the process he goes through when creating large projects such as this one.  How he brainstorms and gets ideas and inspiration, as well as how he organizes his ideas to make it easier to achieve his project goals.

          All of this is covered in Chapter 1 and 2 which goes over all the preliminaries.

          As I said previously there are 161 video lectures they are organized into chapters are follows:

          Chapter 1 - Before We Start
          Chapter 2 - Introduction To Blender And Setup
          Chapter 3 - Materials
          Chapter 4 - Creating A Simple Building
          Chapter 5 - Creating An Advanced Building
          Chapter 6 - Nature
          Chapter 7 - Road And Paths
          Chapter 8 - Light And Atmosphere
          Chapter 9 - Creating A Scene From Scratch
          Chapter 10 - Final Review - Tips & Tricks

          Chapter 2 is a great primer on the basics of Blender usage Rob covers using Blender's most useful tools for this type of project such as modifier usage and how to do basic texturing and renders of things you create.  Also covered is the basics of modeling simple shapes in Blender.

          The final part of chapter 2 takes all the information that has been taught to you up to that point and uses it to create and texture a simple but very impressive looking fence.


          It's at this point that another useful feature of the Udemy educational platform makes an appearance that of "Quiz and Quick Tests".  These are what they sound like as you progress through the course you are tested on what you have learned and rated based on your answers.  These test are only presented at the beginning stages of the course in later parts you are expected to have already learned the key concepts the course has taught up to that point.  Which you are very likely to have by that point as Rob will have drilled home those concepts many times.

          Chapter 3 goes more in-depth on creating and using Blender Cycles Material Nodes for creating realistic look node materials for the models you create while doing the course.  One thing I have noticed with very experienced and talented Blender users is that they often make very impressive results while using the least amount of features of Blender to get those results.  This is the case with Rob he create very simple but very easy and clear to understand Material Node setups which work very well for the purpose they are intended for.  Watching him create his node setups goes to show how efficient the Blender Cycles Material Nodes can be in the right hands.

          If you have never used Blender Material Node system then have no fear Rob goes over all the important features slowly and methodically so by the end of his explanations you should be clear on the way Blender Cycles Material Nodes system works.

          Once the basics of Material Nodes are covered Rob then uses the information to make a material for a leaf which is a technique used throughout the rest of the course.  More advanced topics such as Node Groups are covered.  So by the end of this chapter you will have a good grasp of how the Material Node Editor works and the power and control of materials that it gives you.


          Chapter 4 is your first really in depth test of weather you have been paying attention to what Rob has been teaching you as in this chapter he goes over all the steps to create a simple building that uses all the tools and features covered so far.  So that means modeling, altering, designing and texturing a small building which has various items on it such as windows and various building ornaments.  Don't be fooled this building is simple but in its creation you use all of the features that in later projects will be used to make more detailed and advanced buildings and other things.

          One very handy bonus feature of this chapter is coverage of how appending and linking works in Blender and how you can use it to organize and manage your scenes as they get larger and more complex.


          Chapter 5 - Creating Advanced Buildings is where things start to get very detailed and precise.  You create more advanced houses/buildings, a church and various things like borders, chimneys, roofs and windows with lot of decorations.

          With all this extra details it starts to become necessary to use various techniques to lower the poly count of the models in the scene and Rob goes over the various techniques to achieve the various Level Of Detail effects in Blender to keep the scene to manageable vertices counts within the scene.  The results are very impressive, with massive drops in vertex counts yet no loss in the quality look of the buildings.

          By the end of this chapter building and texturing various building types will be within your grasp and you should be able to take it in your stride.  This sort of modeling is called Hard Surface modeling as unsurprisingly you are modeling things which are man made and which are generally synthetic in nature.


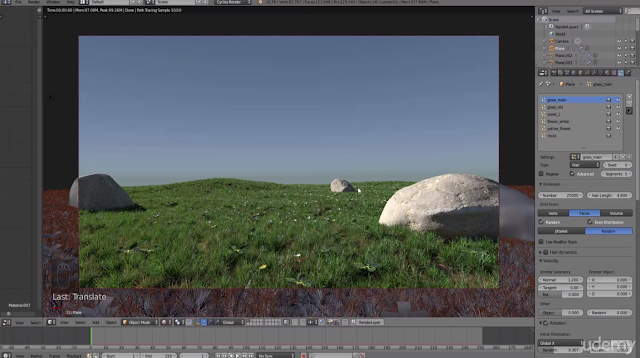
          Chapter 6 - Nature covers the less synthetic side of scene creation that is creating organic things such as grass, moss, ivy and trees, various types of rocks and leaves.


          His coverage of each of these topics is very detailed if you want to know how to make nice looking grass you will really like this chapter.


          One thing to note is that when creating trees Rob uses a paid addon for Blender called Grove 3D.  This is a very effective tree creation addon but Grove 3D does not ship with the course, so you will either need to purchase that separately or use the other tree addon that does ship with Blender.


          Rob covers this addon briefly but for the rest of the course uses Grove 3D.  You should be able to create your own trees using the free addon that ships with Blender or create your trees manually using basic modeling techniques which Rob demonstrated previously.

          There are a lot of topics covered in this chapter but the end result looks amazing the vegetation really makes the scene come alive.

          Chapter 7 - Road And Paths covers the various techniques in creating roads and paths in a scene.  Rob also goes over his process for getting references for good path design.


          Vertex painting is used to texture and create paths that have leaves and grass which can be controlled as to where the leaves and grass appear on the roads and paths.  Also usefully a simple but useful technique for creation of puddles on the path is demonstrated which really added to the realism of the path.

          After dirt paths are covered Rob moves on to creating Cobble Stoned roads and shows a very effective method for creating them.  It is somewhat time consuming but the end result is very impressive.  Small items which help with realism and extra touches such as adding pebbles and sand to the paths are covered.


          Blender's particle system is used extensively to achieve the scattering of leaves, pebbles and grass around the scene in very quick and efficient ways.  Be aware however that you will need a fairly powerful computer to duplicate some of the techniques used, lots of ram and a fairly powerful Cuda based GPU based graphics card.  That said with a bit of forward thinking even on less powerful hardware you should be able to achieve similar results by breaking your scene up and using more appending and linking.  It will just take more organization.

          Chapter 8 - Light And Atmosphere is shorter chapter but the information contained within is no less important.  In fact the information covered on how to use and improve lighting and atmospheric effects within Blender will take your scenes from looking ok to looking spectacular with correct use of the information that Rob imparts.

          The basics aspects of lighting are covered and how Blender uses light to achieve the effects of lighting in the viewport.  Of particular note is the coverage of environment textures and lighting specifically how to use HDRI images which are massively powerful for achieving the realistic look of a scene.

          Also covered is volumetric lighting tools in Blender to achieve atmospheric lighting effects in Blender.  Though be warned you will need a very powerful machine to use this tool or an awful lot of patience as it is a very intensive thing to calculate and use.  It is however truly amazing what a bit of atmospheric haze/fog and mist can do to a scene, so the result may well be worth the wait.

          He demonstrates this by adding an extra video with a scene full of snow showing the effects of fog within a scene.


          Chapter 9 - Creating A Scene From Scratch - This chapter takes all the previous things you learned in the previous chapters and creates an entirely new scene from the ground up.  By this point you are able to test how much you have taken in from Rob and Rob works he way through the creation of a full scene.


          It worth pointing out that Rob used a very efficient way of texturing objects in a scene called project from view, in fact I can't remember if he ever uses Blender's texture seams feature at all throughout his entire course.  He makes what would otherwise be somewhat difficult texturing tasks seem very easy with the techniques he uses.

          Rob's end resulting renders look amazing and by this point I would say that the viewer should be able to make scenes that look just as impressive.  Maybe not as quickly and efficiently as Rob but you will be able to come up with something of equivalent quality.

          Chapter 10 - Is a review of all the things you learned on the course and some extra spit and polish tips and tricks are explained to get even more effective ways to display and render your scenes to take it that extra mile.


          Now I need to point out that this review is a very quick review for a course that is so big.  If I had gone into full details of everything Rob covered throughout the entire course this review would be five times the size and would be lists and lists of features of Blender that Rob used.  It would not make for interesting reading.

          So in short Rob's course is excellent and after watching it you will be able to make some truly impressive street scenes that have both inorganic and organic features.

          The fact that this course is accessible to Blender beginners and achieves such impressive results at the same time I find very impressive.

          If you are interesting in creating and modeling street scenes with all the street furniture and organic elements you should not miss this course.

          Review Score 90%

          11 February 2016

          Gottfried Hofmann - Point Density Magical FX Pro Edition

          Blender as a 3D Creation Suit is going on its ever continuing march of adding new features and improving features that already exists within it.

          One of those improved features of Blender that recently got some attention was Point Density textures.

          Previously Point Density Textures were supported in the Blender Internal Render but not in the Cycles Render.  However recently Blender Cycles gained the support of Point Density Textures.

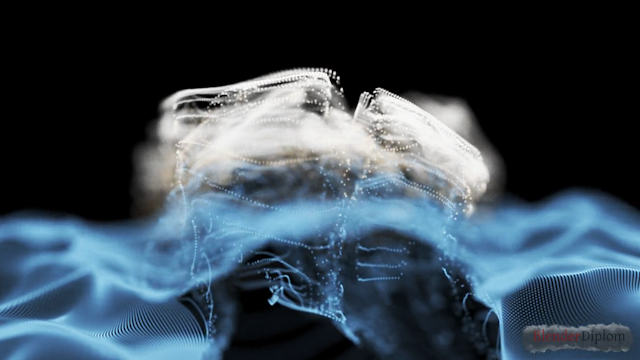
          For those who are not aware of what Point Density textures are the quickest way to describe them is that they are in some ways similar to Blender Smoke features but for vertices and particles.  Anywhere an object, vertices or particle appears in a Point Density Domain (3D Voxel Domain) will be rendered similar to the way smoke particles are.  Point Density support is a form of Volumetric Rendering.

          Point Density Textures allow for a myriad of Volumetic Rendering effects.  Anything where you need smoke-like, dust trails, turning objects in to glowing plasmatic forms, etc without all the intense calculation involved with real smoke simulation the Point Density Texture may be able to step in.

          Now Blenderheads are very quick to take Blenders new and improved features and put them to the test to see what they can do with them.  One of those very experienced Blenderheads Gottfried Hofmann contacted me to ask if I would review his newest product called "Point Density Magical FX".

          Since I am a big fan of Gottfried's work and I really like his BlenderDiplom Blender tutorial website, I was eager to see exactly what he could do with Point Density Textures.

          Product Specifications:

                Gottfried's newest product aims to both describe how to use and setup Point Density Textures to achieve various cool looking special effects and to provides templates which can be used in your own projects for what ever you need.  This useful as there are not really many tutorials on doing Point Density special effects type things so it fills a gap.

                You can download the product from Gottfried's website when you do you are taken to the gumroad.com website.  This website is similar to Blender Cookie in that it allows you to host and sell various types of things such as videos and tutorial.

                I have never used gumroad before but in reviewing Gottfried's work I can say that it was very easy to use.  You can download the various purchased resourced or you can watch them online, it will even let you download directly to a Drop Box account, though I was not able to test the Drop Box feature as I do not own a Drop Box account.

                To start with on getting a request email from Gottfried to review his product I got directed to his website and on purchasing the product I was directed to gumroad.com.  From there setting up an account was very straightforward.

                All purchased products are added to your gumroad.com library where you can browse and view your items as you wish.

                I tend to like to download and watch all the things I have so that's what I did.

                The Point Density Magical FX comes with various things:
                • Templates
                • Demo Files
                • Training Videos
                • PDF-Guide to Point Density in Cycles
                • Starter Files for training Videos
                • .blend of Promo Image
                • Documentation of Templates 
                There are two different versions of Point Density Magical Fx, a Pro and a Training version.  The Pro version comes will all the things mentioned above while the Training version comes with:
                • Training Videos
                • Starter .blends
                • .blend of the Promo Image
                I mainly concentrated on reviewing the Videos and PDF files as these are the most important in getting to grips with how Point Density Textures can be used.

                If you download all the files it is roughly 4gig in size.  So you will need a reasonably good internet connection speed or a lot of free time.  Though the website seems very stable and I had no problems downloading the content.

                The PDF file was the first thing I read and it gave a to the point review of what Point Density Textures are and some of the less obvious points about how they are calculated.  I found this PDF informative and useful.  If you are not one who likes to read PDFs you can get all the same information from the collection of video files that Gottfried narrates.

                It is worth noting that Gottfried's narration is very clear and easy to understand and the quality of the video encoding is very clear and well paced.  I only had basic experience of Blender Internal Point Density Textures and found it very easy to follow Gottfried's explanations of Cycles Point Density Textures.  I think that if you have never used Point Density Textures before you will also have no problems understanding and following Gottfrieds explanations.

                There are 4 videos supplied covering various Point Density Texture based special effects:
                1. Basic Point Density Setup
                2. Stylized Flame
                3. Ocean Of Spheres
                4. Smokey
                The first video shows how to setup a Point Density Texture from first principles.  Showing you the basics of how to get started with them.

                The video then moves on to making a logo illuminated by Point Density Textures.  Also covered is baking and turning Point Density Textures into images which can then be composited.  If you have never used the turbulence force field modifier this is used to achieve random movement of Point Density Textures.

                It is surprising with just some very simple settings and modifiers the quality of the effect Gottfried achieved.

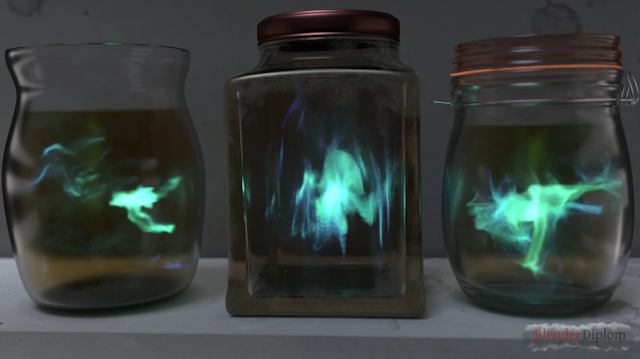
                After the logo was completed the next thing that is demonstrated is using Point Density Textures to place them inside glass jars that can be effected by various light absorption and scatting effects.


                The second video covers the creations of a plasma flame like effect which can surround and object and give it a flaming look.


                Various modifiers and weight painting techniques are covered to achieve these effects, all well explained and demonstrated.

                The third video takes a different approach from the previous two in that it shows how to emulate Point Density Texture like effects without actually using Point Density Textures.  This can help with rendering speed and memory usage.


                The video shows how to take a collection of Dupli-Objects and place the Blender logo across them and have those spheres animated to morph into the Blender logo when the camera moves to the correct position.  The compositor, and the displacement modifiers and various other features of Blender are used to achieve this effect.

                In this video there were some very clever techniques and tips covered.  Of particular note was the tip that you can use the compositor viewer node to save altered images without effecting their native resolution.  Another cool little piece of information was the coverage of how to use the From Dupli tickable option to project an image texture across a collection of Dupli-Objects.  There was also so tips and tricks regarding the use of the RGB curves node.   All useful pieces of information which I did not know about.

                The forth and final video covers using Point Density Textures to create thin wispy smoke that looks similar to how tabaco smoke would look that is animated.


                One stand out point that I did not know in this video was the technique for baking particles that follow a path with the Bake Action feature with Visual Keying active to get particle trails which looks smooth.  I don't know if this is a Blender bug or a feature but, it is still very useful to know how to get around the issue.

                All in all an excellent product that is reasonably priced and very well described.

                If you are looking for how to learn Point Density Textures or just want the Blend files for making your own versions of the logos for your own products then Gottfried's latest product is for you.

                Review Score 95%

                13 April 2015

                Complete Dinosaur Creation by Steve Lund - Video Training Course Review

                Having reviewed a fair number of 3D modeling courses that use Blender, I have seen many different things created, and in general I am more interested in the features of Blender that are demonstrated than that actual thing that is created.  However there is one particular thing that my inner 7 year old does like and that is dinosaurs;  When the particular dinosaur is the mighty T-Rex well then so much the better!

                So when I was contacted by CG Masters and asked if I would review their latest Complete Dinosaur Creation course I of course said yes, because well dinosaurs and Blender you can't really go wrong with that combination.

                For those that have been Blenderheads for a while or have previously read some of my other reviews you will already know who CG Masters are, but for those that haven't CG Masters are the creators of many high quality tutorial courses which go through the process of creating various things with Blender from beginning to end.  Their tutorials cover the range of Blender user experience levels from beginner up to very advanced.

                Product Specifications:
                 
                      The Complete Dinosaur Creation course is instructed by Steve Lund a very knowledgeable Blenderhead who is also known as CG Geek on G+ ( https://plus.google.com/+BlenderSteVe/posts ).

                      After having downloaded the course content you have a number of ways of accessing it.  You can if you want use your web browser to access the course resources or access them directly from the resource directories.

                      Of the various resources made available in the download are:
                      • Various Texture files for the course
                      • The Blend files for the course
                      • Video course files
                      • Blender 2.72b (Windows & Mac)
                      It's worth noting that as I reviewed this course on a Linux machine I had no issue viewing or using the content, even though the Linux version of Blender is not supplied with the course, it is very easy to get from the official Blender Website.  I used the newest version of Blender and all the content of the course is still compatible with it.

                      Since I reviewed the downloadable version of the course it came as a collection of archive files with a download size of 13.5GB which means that unless you have a very fast internet connection it is going to take a while to download.  So if internet speed is an issue then you may either want to use a download manager to get the files or instead get the DVD version of the course.

                      The videos in the course are very clearly encoded and well narrated by Steve who is for the most part a very clear speaker and does a very good job of explaining what he is doing and why.  This is definately a good thing as the entire course is over 13 and a half hours in length.  If you are going to follow along while watching you will need a lot of free time.

                      The video introduction to the course goes over the topics that will be covered and shows what the end result will be.

                      After the intro Steve shows the viewer how to do basic blocking of the T-Rex form and the basics of how to setup Blender 3D Viewport background images to aide in creation of the T-Rex model.  The T-Rex is initially created using the poly by poly modeling method.

                      Having blocked out the T-Rex Steve covers using the Mirror modifier and Blender's Proportional Editing Tools.

                      I am not T-Rex expert but to me the modeling looked realistic, though if there are any palaeontologist out there you will have to make your own decisions. 

                      With the basic T-Rex forms created Steve then refines each of the major parts of the T-Rex model adding progressively more and more detail at each stage.  Unlike the rough blocking stage Steve uses a combination of vertex and face pushing and pulling and extensive use of Blender's Sculpting and Proportional Editing tools to add the fine mesh details to the T-Rex mesh.

                      While this courses aim is to produce a dinosaur and not teach the finer points on the techniques of sculpting in Blender, Steve's use of Blender's Sculpting features is clear and easy to understand and he does take the time to explain the sculpting features that he uses throughout the course;  So if you haven't used Blender's Sculpting tools before you should not have any problems following along to what Steve is doing.  Sculpting and Multires were used thoughout and Steve makes sure to properly explain how to use the Multiresolution Modifier.  Blender's Dynatopo feature wasn't used, not sure why but it didn't seem to me that the workflow process Steve used suffered in any way because of this.

                      The one small issue I noticed and I am probably being a bit nit picky was that at one point Steve had an issue with Mirror Modifier splitting the mesh and leaving a hole in the mesh along it's center line.  He eventually managed to determine what the cause of this issue was and fixed it in later parts of the course;  It may have been better to pause recording at this point find the issue fix it and then tell the viewer what the issue was and how it was fixed rather than having issue present until later videos.

                      As the T-Rex got more complex Steve gave various tips on how to keep the performance of Blender high and allow you to model the T-Rex in a fluid responsive manner.  Blenderheads that have been using Blender for a while will likely know those tips but for newer Blender users it will be handy extra information to have.

                      The next major part of the course comes when covering the texturing of the T-Rex.  All the texturing is done using the Blender Cycles rendering engine rather than the Blender Internal rendering engine.  This means that you get all the power of Cycles renderer but you will need some patience when doing renders if you don't have a particularly powerful Graphics Card.  Topics such as how to carry out the basics of using Cycles Shading Nodes are covered in a clear way.

                      Normal Maps and Normal Baking and how it works as well as the processes involved in UV Unwrapping are all explained in a very clear way.

                      After the basics of Normal Map creation and applying those Normal Maps are gone over Steve moves onto using one of Blender's newer features, Image Stencil Texturing.  This feature allows easier more intuitive texturing on the surface of a mesh.  I am not certain but I think this is the first commercial course that I have seen that covers the use of this new feature.  Steve did a very good job of explaining what it is used for and its various features.

                      Steve uses the Image Stencil Texturing feature to very good effect, he textures the T-Rex mesh very efficiently and it really shows the power of the Stencil feature.


                      With Blender Cycles having Subsurface Scattering for a while it's good to see Steve use it to give even more realism to his T-Rex, has does a reasonably good job of explaing what the various SSS node settings do.

                      He shows a good technique to add scars to the T-Rex using Specular Mapping and Painting on the scars using Texture Painting.

                      One thing I really liked was Steve's explanation of how to make changes to a low poly mesh and then have those changes be transfered to the high poly sculpted mesh improving normal map quality.  I didn't know about this feature and it looked super useful.

                      Grunge texturing techniques are demonstrated using another Blender feature I haven't seen used before the Brush Mask feature.  This is yet another very useful feature.

                      The next stage of the course covers the techniques for adding a rig to the T-Rex so that it can be posed and animated.  Only the basics of rigging and applying the rig to the model are covered but they are enough to get a reasonable animation walk cycle created for the dinosaur.  The basics of creating and using Shape Keys is covered.  Again you won't end up being a Shape Key expert but the informtion that is covered is useful.


                      The T-Rex is integrated with video footage using Blender's Motion Tracking feature.  This was clearly explained and demonstrated, and if you have never used Blender Motion Tracker before you should be able to now do basic Motion Tracking in Blender.

                      Another of the things that caught my eye was when the dinosaur was being animated was the use of Dynamic Paint to make foot print deformations in the ground as the dinosaur places its feet on the ground.

                      Also integrated with the ground deformations was a simple method of adding a dust upwelling effect when the feet strike the ground using Blender Cycles Particles for dust effects and debris scattering.

                      With the dust, debris and scene integration covered Steve covers setting up HDRI environments and lighting the scene so it looks visually appealing.


                      Finally the often tedious but useful issue of rotoscoping/masking is covered so that various unrelated elements in a scene can be composited together to look like they are in the scene together.  The masking was basic but showed the overall process well.

                      This was a great course, I enjoyed watching it, even though it took me quite a while to watch all of it.

                      If you want a course that shows you all the major steps in creating, modeling, texturing, animating and rendering a project with a T-Rex or any other sort of megafauna this is the course for you.

                      Review Score 90%

                      17 March 2015

                      Blender Cookie - Blender Basics & Mesh Modeling Fundamentals Course review

                      I was recently contacted by the people at Blender Cookie the educational site concerned with all things Blender 3D and asked if I would review two of their courses:
                      • Blender Basics - Introduction For Beginners
                      • Mesh Modeling Fundamentals In Blender
                      I have been a big fan of Blender Cookies previous tutorials so I agreed to do a review of both the products combined.

                      Before I move onto the review of the two courses, it is perhaps useful to first give some information about the Blender Cookie website and some of its features.

                      The Blender Cookie website is sub-section of a larger site called CG Cookie which is run by Wes Bruke.  The CG Cookie website acts as a educational hub around which you can learn many different topics using various different pieces of software (not just Blender) as well as various courses on more traditional forms of learning such as drawing, painting and traditional hands on sculpting.

                      The site is split up into the following main sections:
                      • CG Cookie
                      • Blender Cookie
                      • Concept Cookie
                      • Max Cookie
                      • Unity Cookie
                      • Sculpt Cookie
                      The CG Cookie section covers things like interviews and topics that are not specifically tied to a particular piece of software (as far as I am able to determine).

                      The Blender Cookie section covers courses and tutorials which specifically use Blender.

                      The Concept Cookie section covers concept art and design as well as user exercises such as drawing and such like.

                      The Max Cookie section covers the 3D software 3D Studio Max, for those in the unfortunate position of having to use this inferior software :).

                      The Unity Cookie section covers the Unity game engine system, for those that want ot make real time games.

                      The Sculpt Cookie section covers sculpting methods and tutorials for both traditional (hand and clay) and digital sculpting.

                      So as is probably becoming apparent CG Cookie coverages an awful lot of educational topics.  Now because I am a Blender user I will generally only focus on Blender Cookie section of the website.  It is important to realize though that all of the features that the website provides are provided across all the different sections of the site as a whole.

                      In general most of the educational content is provided in the forms of high quality videos which can be streamed directly in your browsers (and is HTML 5 compatible).  The videos are very well encoded and very well narrated.  If you don't have the fastest internet connection you can watch most of the videos off line by downloading them.

                      Also useful is that some of the videos also have Close Caption support, this doesn't extend to all videos but I assume that over time more videos will get more Close Caption support.

                      If you are not into the video style of education then there are also occasionally written tutorials but note that the vast majority of the tutorials and courses on the site are video form.

                      For tutorials which require resources such as project files they are also provided with the videos.

                      The website recently underwent an upgrade which added a number of features and one of the most noticeable was gamification features.  In education Gameification means turning learning into a game which reward you with things like a score or in CG Cookies case XP points can be gained by taking quizes on the material you have seen or for using certain features of the website.  This allows members of the website to compete with each other to improve their skills.  You can track your progress with your own Dashboard and compare against other members using the leader board.

                      https://www.youtube.com/watch?v=X9o9Zq3YtHw

                      CG Cookie provides access to its content in 3 basic ways:
                      • Free to access by everyone
                      • One off payment to buy a particular course
                      • Citizen Membership ($18 per month)
                      For courses that are not free the Citizen Membership is popular as not all the courses have the option to buy them out right.

                      As well as providing access to various educational materials the CG Cookie website also acts as  sort of educational social site where users can interact with each other and post in their galleries which other users can comment on.  You can follow users and keep track of what each member is upto when they are on the CG Cookie website.

                      https://www.youtube.com/watch?v=pWexRSc38P4

                      I have not really explored the social side of the site but it seems pretty effective if the galleries posted on the site are anything to go by.

                      Navigation around the site is as far as I am able to test fast and effective, videos downloaded quickly and web pages loaded quickly as well.

                      All in all a good website, well organized and covering a seriously large amount of topics.

                      Anyway now that I have given (a brief and probably very incomplete) run down of some of the features of the CG Cookie website it's time to move on to giving my review of the two courses mentioned previously:
                      • Blender Basics - Introduction For Beginners
                      • Mesh Modeling Fundamentals In Blender

                      Blender Basics - Introduction For Beginners

                      Unsurprisingly given the title of the course, this course covers the very basics of using Blender.  It is split up into 6 video parts, 4 of which cover using Blender:
                      • Introduction for Beginners
                      • Interface and Navigation
                      • Selecting and Transforming Objects
                      • Adding and Removing Objects
                      • Using and Customizing the Interface
                      • Last Words
                      The course is aimed squarely at Blender beginners, if you have any experience with Blender previously this course will not be of use to you.

                      Each of the 6 videos in the course are very short, each one covering a specific basic topic of Blender usage.

                      The entire course is free to everyone and is narrated by Jonathan Williamson a very experienced Blenderhead.  Like all of Jonathan's educational videos they are very well narrated and well produced.  He explains everything very clearly in all of his videos.

                      These videos have Closed Caption support.

                      Introduction For Blender Beginners - Covers what topics will be covered in the other videos in this course.  Gives a basic explanation of what Blender 3D Viewport is and what 3D is in general for those entirely new to 3D modeling.

                       
                      Briefly Panning, Zooming and Rotating the 3D Viewport in Blender is demonstrated.  Selecting and moving objects using the 3D Manipulator is described and shown.

                      Interface And Navigation - This videos covers the basic properties of Blender's 3D Editor interface elements.

                      The Tool Shelf region and the 3D Viewport Properties region interface elements are explained and brief explanations of what they are used for is explained.  The same also goes for the Info, Outliner, Properties and Timeline Editors.

                      Blender Editor Headers are demonstrated and it is explained that they can be flipped from top to bottom and vice versa.

                      Finally switching between different 3D Viewport viewing directions is covered using the Numpad and View Menu, as is switching between Perspective and Orthographic view modes.  It may have been useful here to explain when Perspective Vs Orthographic modes are needed.

                      Selecting and Transforming Objects - This video first covers how to select objects with the mouse.

                      Surprisingly it shows how to use the User Preferences to change the mouse button which is used to select objects from right mouse button to the left mouse button.  This is somewhat odd for a beginners tutorial and introduces non-standard ways of using Blender, seems to me to set a bad example.

                      Next how to select and deselected multiple objects is covered, and a clear explanation of the difference between a selected object and the Active Object is covered.

                      Once selecting objects had been covered the topic moves on to how to delete selected objects.

                      The 3D Manipulator is covered, showing how switch into it's various modes of operation and then transformed selected objects with it.  Also covered are carrying out the same operations with keyboard hot keys.

                      Transform manipulation using Axis Constraining is gone over also.

                      And finally for this video a brief explanation of what the 3D Cursor is and what it is used for is covered.

                      Adding and Removing Objects - This video covers adding and removing objects using the Toolshelf, hotkeys and menu entries.  Also covers some information on the effect of macro functions on duplication of objects.

                      Using and Customizing the Interface - This video is slightly more in-depth than the other video as it covers a fair number of the different methods for altering the layout of Blenders Interface, as well as covering what the difference is between an Editor and a Region.  Layout manipulation types covered are:
                      • Resizing Editors
                      • Resizing Regions
                      • Changing Screen Layouts
                      • Splitting/Joining Windows
                      • Changing Editor Types
                      • Saving Custom Layouts
                      And the final topic for this video covers Blender's Theme System and how to change your theme.

                      Bear in mind that the purpose of this course is to give you the absolute basics of using and getting around in Blender.  It can be seen as preceding a more detailed and advanced course "Mesh Modeling Fundamentals In Blender" which I review next. 
                       
                      Mesh Modeling Fundamentals In Blender

                      The second review is of the "Mesh Modeling Fundamentals In Blender" course, which follows on from the "Blender Basics - Introductions For Beginners".

                      This course is more indepth and covers more of the features of Blender but is still aimed at the beginning Blender user.  It is not free however so you will need to be a Citizen Member of CG Cookie to access all of its videos.

                      It consists of 24 lessons which are video based and 3 of which are text based quizzes.  Just like the previous course the lessons are short bite sized lessons.  

                      The course is again narrated by Jonathan Williamson.

                      This time around the focus is more generally targeted towards the tools that can be used on Blender Mesh objects.  There is some tiny overlap in topics covered in this course as in the previous one.

                      The topics covered are:
                      • Creating Mesh Objects
                      • Editing Modes
                      • Mesh Anatomy
                      • Mesh Selection Modes
                      • Subdivide
                      • Extrude
                      • Loop Cut And Slide
                      • Inset
                      • Knife
                      • Delete And Dissolve
                      • Select All
                      • Select More / Select Less
                      • Box Selection & Circle Selection
                      • Edge Loops
                      • Edge Rings
                      • Solid Vs Wireframe Shading
                      • Limit Selection To Visible
                      • Mesh Hiding & Mesh Unhiding
                      • Transform Orientations
                      • Object Mesh Data
                      • Sharing Data On Object
                      Creating Mesh Objects - This section of the course covers creating objects using the Toolshelf to add objects and also explains some of the Toolshelf entries.  The use of the 3D Cursor and it's role in positioning newly added objects to the 3D Viewport is clearly explained.  The roll of the Properties Panel is explained and how to use it to accurately position the 3D Cursor.

                      When adding objects to the 3D Viewport sometimes they can have extra options displayed in the Operator Panel.  Jonathan explains how these changable settings can be manipulated.  Handily Jonathan also shows the alternate Operator Panel which can be accessed by pressing the F6 key while the mouse is positioned over the 3D Viewport.

                      Editing Modes - Blender is heavily dependent on use of modes which change the way Blender works and the tools which Blender will present to the user.

                      Jonathan goes over the major differences between two of Blender's major operating modes "Object Mode" and "Edit Mode" with regard to Mesh Objects.  Jonathan shows multiple ways to switch between the two modes quickly, and also demonstrates how the Toolshelf entries change based on the mode Blender is in.

                      Mesh Anatomy - This section covers how mesh objects are constructed and how you as the user can edit mesh geometry only while in Edit Mode.

                      Mesh Selection Modes - Once in Edit Mode you can choose what type of mesh geometry you wish to easily select, this is achieved with the Mesh Selection Modes.  Jonathan goes over how the Mesh Selection Modes affects how you can select various parts of a meshes geometry.  Strangely the CTRL+TAB method of opening the Selection Mode menu was not covered.

                      Subdivide (Operator) - The Subdivide operator and some of its options are well covered and Jonathan does a good job of explaining just how useful this tool is.  He shows how to use Subdivide to divide a mesh equally in vertical and horizontal directions and also covers how to Subdivide in only one direction.  He also takes the time to issue the warning of accidentally creating very high density meshes if subdivide is used to quickly.

                      Extrude - The Extrude tool is quite possibly one of the most often used tools when mesh modeling in Blender and Jonathan does a very good job of explaining what it is and how to use it.  Extrude Region and Extrude Individual versions of extrude are covered.  How to access the Extrude menu with ALT+E is also described.

                      Extrude is a form of macro and Jonathan explains why this matters and what effects it has when cancelling an extrude operation.

                      Loop Cut And Slide - Adding and positioning loops cuts into your mesh geometry is very import and being able to do it quickly is very important to quick and efficient work flow when modeling.  Jonathan goes over how Loop Cut And Slide works and also covers some of it limitations with regard to non-quad faces.

                      Inset - The Inset tool is a reasonably newly introduced tool added to Blender that is extremely useful and a real time saver when you need to add inset faces and panels in mesh geometry.  Jonathan does a good job of explaining some of its options and shows a good few ways to use it to do useful things.

                      Knife - The Knife Tool is used to cut extra vertices into Mesh Geometry where you need them.  Jonathan explains the tool very well.

                      Delete & Dissolve - These are two related but different tools in Blender both of which have multiple ways of working depending on the version of the tool you select.  Jonathan explains clearly what these tools are for and how they differ from each other.  Since the Dissolve tool was introduced when Blender got support for NGons it is newer than the older delete tool and some people are not upto speed on the difference.

                      Select All - This section covers how to select or deselect all mesh geometry.

                      Select More/Less - Being able to select parts of a mesh and then have Blender automatically increase or decrease the amount of selected mesh geomtry is very useful.  Again Jonathan does a good job of explaning this feature and the various ways of activating it.

                      Box & Circle Selection/Deselection - If you want to select or deselect large sections of a mesh quickly then Box and Circle Selection tools are the tools you will often use.  These are modal tools this means that while these tools are active all you can do is select or deselect parts of a mesh, other features are unavailable to you until you leave this tool.  This is not made clear by Jonathan but his coverage or the rest of their features is good.

                      Edge Loops & Edge Rings - These two videos go into depth on what Edge Loops and Edge Rings are and how to select mesh geometry using these two types of structure.  Also covered is selecting multiple Edge Loops and Rings at once.

                      Solid Vs Wireframe Shading - Blender supports many different ways of displaying mesh data in the 3D Viewport.  Each different display mode has its advantages and disadvantages depending on when they are used.  Jonathan describes two of the major display modes:
                      • Solid Shading
                      • Wireframe Shading
                      Jonathan describes how to quickly access these display modes in Blender and describes how these modes differ and why you would want to use them.

                      Limit Selection To Visible - When dealing with complex mesh geometry Blender by default will not let you select mesh geometry which is positioned behind other mesh geometry.  This prevents accidentally selecting mesh geometry behind a mesh when all you wanted was to select mesh geometry on the front of a mesh.  This is often what is wanted, sometimes though you want to select all geometry that falls in a particular location and the Limit Selection To Visible setitng is what is used to achive this.  Jonathan does a good job of explaining what this tool does and showing the differences in how mesh geometry in the 3D Viewport are display when this option is enabled and disabled.

                      Mesh Hiding - One of the ways of dealing with selection of parts of a complex mesh is to temporarily hide parts of the mesh you no longer need to see.  This makes the mesh less complex and makes it easier to interact with.  When you are done you can unhide the hidden geometry and carry on your work.  Jonathan's explanation of Hiding and Unhiding mesh geometry was very complete.

                      Transformation Orientations - Blender has various ways of representing and interpreting how an object is tranformed.  The two most popular are Global and Local Orientations.  Although this topic can be somewhat difficult to explain clearly Jonanthan does a good job without getting too technical.

                      Object Mesh Data - Mesh Objects in Blender are basically made up of many independent data structures.  These structures can be shared between multiple objects and switched and changed at will by the user.  Again Jonathan does a good job of describing why this is useful.

                      Sharing Data Of Mesh Objects - Following on from the previous video Jonathan goes through how to link object data together so that they ca share data, he covers both standard duplication and linked duplicate methods.  Blender keeps track of the number of times data is shared and Jonathan shows how you can determine how many objects share a particular piece of data through user counts.  He also shows how to take data that is shared and make it a single user.

                      So that is all the video sections covered in this review and I would say that on the whole if you are a new Blender user or are new to 3D in general these two courses combined will be very useful to you, as I think they will very quickly get you up to speed with Blender and 3D in general. You won't be a expert and you will still have a lot to learn but you will have the fundamentals.

                      All the videos are clearly explained and Jonathan does a very good job in them all.  My only complaint is the use of Left Mouse Button to select objects as this is non-standard and confusing to Blender users.  It even confuses Jonathan a few times.  This is small complaint and I find it strange that he did this but the rest of the course is good.

                      Well worth getting if you want to get upto speed with the fundamentals of Blender.

                      Review Score 80%

                      10 March 2015

                      Enrico Valenza - Blender Cycles Materials & Textures Cookbook 3rd Edition - Ebook Review

                      Another day another Ebook reviewed in my recent catch up session to clear the backlog of unreviewed books that I have left to read through.

                      This time around it's a book by Enrico Valenza a very experienced Blenderhead who has written multiple books for Blender.

                      This is Enrico's 3rd book from his "Blender Cycles Materials & Textures Cookbook" series.

                      Unsurprisingly given the title of his book, it covers using Blender Cycles to create material and texture node setups in Cycles to achieve various different styles and types of materials that can be applied to objects.

                      Because this book is presented in the form of a cookbook it presents it's contents as a series of recipes, each recipe describing a particular method for achieving a particular visual effect in Blender Cycles.  Once the recipes have been documented the book then explains the recipes in detail showing why it was created the way it was and what the advantages/disadvantages of the recipes are.

                      Given that the information in this book is in recipe form, it is important that the recipes are accurate and as far as I was able to determine they are very accurate, there did not seem to be any silly errors.  This is unsurprising as the reviewers for this book were all very experienced Blender users.

                      Product Specifications:


                            There are lots of recipes described in this book (40+) covering many different areas of material and texture creation. This is one of the reasons the page count for the book is 400 pages.

                            The 400 pages are split up into 9 chapters which cover very broad areas:
                            • 1 - Overview of Materials in Cycles
                            • 2 - Managing Cycles Materials
                            • 3 - Creating Natural Materials in Cycles
                            • 4 - Creating Man-made Materials in Cycles
                            • 5 - Creating Complex Natural Materials in Cycles
                            • 6 - Creating More Complex Man-made Materials
                            • 7 - Subsurface Scattering in Cycles
                            • 8 - Creating Organic Materials
                            • 9 - Special Materials 
                            The introductory text in the book takes some time to explain the major differences between Blender Internal render and Blender Cycles.  Although this book is aimed at a Blender user with some familiarity with Blender, if you are completely new to Blender you will be able to follow along while reading.

                            The versions of Blender covered in the text range from version 2.71 to 2.73, so if you are using older versions of Blender you may notice some differences between the book and your version of Blender.

                            All the recipes in the book come with the resultant Blend files, so if you do not want to follow along and just pick apart blend file to see how to achieve the various effects you can do so.  The blend files are available on the Packt Publishing website.

                            Chapter 1 - Starts with a basic introduction to some of the terms that are used with Blender Cycles and details how to setup and activate Blender Cycles render so that you can use it on your projects.  The advantages and disadvantages of Cycles are covered in brief.  As is the advantages and disadvantages of using Cycles Rendering on a Cpu/Gpu.  Followed by a quick example of how to use Blender Cycles Node setups to affect rendering.

                            How to improve render quality and remove noise is covered so as to allow you to get better results from your renders in a shorter amount of time.

                            Procedural textures are explained and demonstrated using various basic nodes, as is the bump and normal texture nodes.


                            World Materials setup is covered as well as the often asked question of how to make the background transparent in renders.  The coverage of how to use environment textures and sky textures was very easy for me to understand and I think will save newer Blender users a lot of time.

                            Various options of the Lightpath node are covered which allow the user to only have certain elements that are visible in a scene show up in a final render.

                            Ambient Occlusion is described and there was a useful section describing what is and is not taken into account for material properties when Ambient Occlusion is being generated.

                            Blender Cycles Mesh Lighting types are covered and contrasted to the lights that are used with Blender Internal.  The basics of how to control the amount, color and weather light is emitted from both or only a single side of a mesh light is explained, as is setting a mesh light up to light a scene but not have the mesh itself visible in a scene.


                            Having gone though the more basic properties of materials and textures the chapter moves on to Blender Cycles support for volumetrics and how to use them to achieve some simple but interesting looking effects.


                            And finally for this chapter using textures to enable displacement of meshes is covered.  Be aware that when this book was written this feature was still experimental so may change in the way it works.


                            Chapter 2 - Goes over some of the major ways to make your workflow with Blender Cycles more organized and efficient by showing you how to arrange Blender's interface to make it more responsive when using Cycles.

                            Topics such as setting up new screens, altering and saving a new defaults file is covered.  More basic but none the less very useful advice such as giving materials and textures informative names is covered.

                            More advanced method of organizing elements in Blender are also covered such as Node Groups, Layout Frames, Coloring of Nodes and importing and exporting elements into and out of Blender.

                            I learned that you could use ctrl+p to parent nodes into frames which I wasn't aware of.


                            Chapter 3 - With the basic concepts covered the book then moves on to the process of taking the information from the previous chapters and creating usable materials.

                            Specifically in this chapter the creation of Natural Materials is the purpose.

                            The first material that is created is a rock material which is created with image textures and combinations of bump maps.  I think this is the first book that I have read that details using the Box Blending method to achieve good texturing results without having to UV Unwrap a mesh.


                            After explaining how to make a rock texture with image textures the book then explains how to make a rock texture entirely using procedural texturing methods.


                            Where there is rock there is often sand which is handy as the next recipe covered is how to make a simple sand material, again using procedural texturing methods.  Another handy tip was shown describing how to make the materials generic and tweakable using Node Groups with alterable options.


                            By this point in the book the node setups and recipes can be somewhat involved and you will be glad that you have access to the blend files.

                            Next in the recipe list is a very simple and basic method for making a rocky ground type texture.  Not the best looking but is very simple and quick.


                            If you are getting bored of all the rock based materials then have no fear the book moves on to explaining the softer material of snow and how to create it using procedural textures and translucency.

                            Snow being a material that only generally looks right with SSS applied it can be slow to render, so usefully a method of faking SSS using translucency is described.


                            One material that is often requested by Blender users, is a good method for making a material that looks similar to how ice would look.  So an ice recipe is provided.  It's not the most advanced ice material ever but it is good enough and since you have the blend files you can always tweak it as you see fit to get the results you require.


                            Chapter 4 - Concentrates on creating materials which look man made specifically:
                            • Generic Plastic
                            • Bakelite
                            • Expanded Polystyrene
                            • Glassy Polystyrene (clear hard plastic)
                            • Rubber
                            • Antique Bronze
                            • Configurable Metal
                            • Rusty Metal
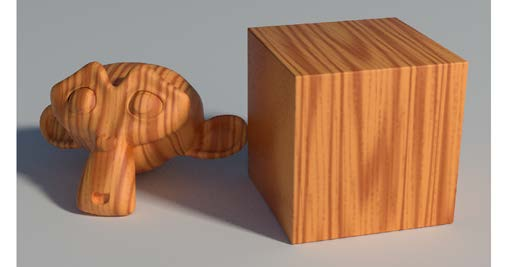
                            • Wooden Material


                            Chapter 5 - Covers creating more complex and larger scale materials.

                            If you have used Blender for any length of time you will often want to have a quick way of generating large scenes with ocean water.  Blender has an ocean water feature, but it is not the most flexible feature.  So instead the book documents a method which gives an ocean which is created manually using various Cycles Nodes to increase flexibility.


                            After creating the ocean surface obviously you need to create a material which can represent what the environment looks like when you are under the ocean, so the book moves on to creating an under water environment material.


                            Rendering a underwater scene using volumetrics can be very slow so a method is used which fakes the volumetric effect.

                            While in previous sections of the book materials such as snow and rock have been described, combing these types of materials to form a shader which creates mountains which have rock and snow on them and reacts to the height/angles of the mountain surfaces to determine where snow should be is described.


                            Finally for this chapter we go out of this world and a recipe for creating a render of earth as seen from space is demonstrated, using a combination of image textures and various other types of image maps to create elements such as land maps, clouds and water sections of the earth render.  There is no outer atmosphere but the earth shader looks good at a quick glance.  The techniques shown here can be used with many different types of texturing tasks, especially with regard to unwrapping a UV Sphere.


                            Chapter 6 - Covers creation of 4 materials:
                            • Cloth Pattern Shader
                            • Synthetic Sponge
                            • Leather
                            • Spaceship Hull Shader

                            According to the book these are more complex man made material types.  While I can't comment of the complexity, they are useful material types to know how to make.


                            The Spaceship hull shader is the standout recipe in this chapter and shows some very clever techniques to use very simple textures to displace a torus to make a futuristic looking flying torus craft.  Also covered is a way to apply decals to the craft.

                            Chapter 7 - Subsurface Scattering In Cycles chapter covers various features of Blender's SSS tool and details most of the SSS node control values explaining how to use them.  Because SSS is slow to render the chapter explains various techniques to fake the look of SSS.  For this the translucent shader is use as well as the Dirty Vertex feature and the Ray Length Light Path node.  They together help to achieve SSS in efficient ways and for the most part look very similar to real SSS.  If you are ok with the slow speed real SSS is also covered.


                            Chapter 8 - This chapter covers creation of shaders for living organic materials:
                            • Blobby Skin Shader
                            • Wasp Chitin
                            • Irridescent Beetle Material
                            • Tree Bark
                            • Tree Leaves
                            • Human Skin
                            • Alien Grey Skin
                            • Fur And Hair
                             

                            The Tree material was interesting to see how it worked, the book also had a handy method of getting rid of seams on the tree branches.  The skin shader looks nice but I can't say how accurate it is compared to real skin.  I also liked the fur/hair material, as it gave a nice effect and I haven't seen enough coverage of Cycles fur or hair in many books, so it's good to see it mentioned.

                            Chapter 9 covers a grab bag of materials which didn't fit into other chapters, such as:
                            • Fire
                            • Smoke
                            • Materials that take depth into account
                            • Shadeless Materials
                            Fire and Smoke have got a lot more flexible in recent versions of Blender Cycles and it has also gotten easier and faster to create.  The book initially shows you how to make fire and smoke using the Quick Effect method and then shows the manual way to create the same material.  This helps to understand how it all works behind the scene.  The fire and smoke effect looks pretty good for a static image render.


                            I really liked the depth based material effects and they were surprisingly easy to create compared to most of the other mentioned materials in the book.


                            As any book on material in Cycles must do there is a recipe for creating clouds.  Which with some tweaking could be very useful.


                            All in all given the large range of material recipes described by this book there is highly likely to be some recipes that you find useful and will want to use.  Yes some of the materials are a little simple and some could be made to look better with some tweaking.  But on the whole I like how most of the recipes look.

                            Cycles has improved a lot with its supported materials and different node types, that it supports, making it easier and easier to make complex looking surface and depth based materials.  This book does a good job of showing off Blender Cycles power.

                            This book is well worth getting if you don't have the older editions and even if you do there is enough in this new one to make it worth purchasing.

                            Review Score 93%